Painting or whitewashing hardwood floors can completely transform the look and feel of your space. Whether you’re aiming for a rustic farmhouse style, a beachy Scandinavian aesthetic, or a bold, modern statement, painting your floors can be a cost-effective and stylish way to revitalise your home. The best part? You can do it all without the dusty, labor-intensive process of sanding.
This guide is designed specifically for UK-based DIY enthusiasts, young homeowners, designers, and professionals who want to breathe new life into timber flooring without the mess and hassle of traditional floor sanding. Whether you're in a city flat or a countryside cottage, this approach offers a practical solution for elevating your space on a budget.
Why Skip the Sanding?
Sanding is traditionally used to prepare wood by removing the old finish and creating a surface that primer and paint can adhere to. But sanding hardwood floors is loud, messy, and time-consuming—not to mention the cost if you opt to hire professionals or rent equipment. It can also be risky, especially with engineered hardwood, as over-sanding could damage the veneer and reduce the floor’s lifespan.
Modern primers and floor paints have evolved considerably in recent years, providing excellent adhesion and durability even without intensive floor prep. Thanks to bonding primers and specialty floor paints, you can now paint or whitewash directly over existing floor finishes—as long as the surface is clean, dry, and properly prepared.
By skipping the sanding process, you save days of work and significantly reduce airborne dust particles in your home, which is especially helpful for families and pet owners. It also allows you to begin your transformation faster and with fewer tools.
Is Your Floor Suitable for This Method?
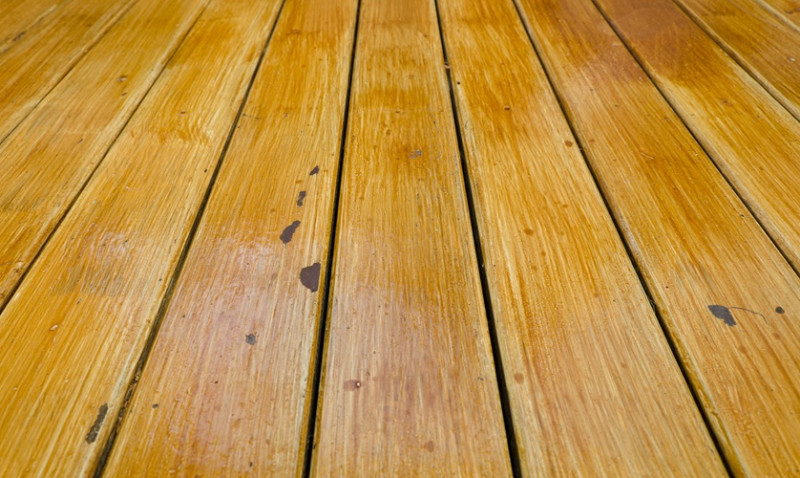
Before starting your painting or whitewashing project, it’s critical to assess whether your hardwood floors are suitable for a no-sanding makeover. Not all floors are created equal, and their current condition plays a big role in determining what results you can expect.
This technique works best on solid hardwood or engineered wood flooring with a smooth, sealed surface in good condition. If your floors are warped, deeply scratched, or water-damaged, you may still need professional refinishing or board replacement before proceeding.
Make sure to test the existing finish by sprinkling a few drops of water on the floor. If the water beads up, the surface is sealed and ideal for this no-sand method. If it soaks in quickly, the surface is more porous and may require sealing or light buffing to ensure proper paint adhesion.
Additionally, this method is not suitable for laminate or vinyl flooring. While these materials can often be painted, they require different preparation techniques and compatible paint products.
Tools and Materials You’ll Need
Gathering the right tools and materials before getting started is essential for a successful and efficient project. Here's a list of what you'll likely need for a no-sand hardwood floor painting or whitewashing job:
- Heavy-duty floor cleaner (like sugar soap or TSP alternative)
- Microfibre mop and buckets
- Paintbrushes and rollers (preferably with long handles)
- Painter’s tape and plastic sheeting
- Deglosser or liquid sandpaper (optional for extra adhesion)
- Bonding primer specifically designed for wood
- Hard-wearing floor paint or whitewash finish (oil-based or latex-based)
- Topcoat or sealer suitable for floors
- Protective gear (gloves, mask, and safety goggles)
Using quality products is key here, especially since you’re working without sanding. Look for specialist paints and primers approved for floors with minimal preparation. Brands like Ronseal, Rust-Oleum, and Dulux Trade offer floor paint products that adhere well and can withstand daily wear and tear, perfectly designed for UK homes.
Step-by-Step Guide to Painting Hardwood Floors Without Sanding
Follow this careful preparation and application process to ensure your painted floors look stunning and last for years.
- Clean Thoroughly: Start by removing all furniture and vacuuming the floor thoroughly to remove dirt and dust. Use a degreasing cleaner to scrub away oil, grime and any residues. Let the surface dry completely.
- Use a Deglosser (Optional): If the sheen on your floor is high (like a glossy polyurethane), apply a liquid deglosser to dull the surface slightly and help the primer stick better. Follow the product instructions closely and work in a well-ventilated area.
- Tape Off Edges: Apply painter’s tape around skirting boards, thresholds, and door frames for clean lines. Cover any adjacent areas to protect them from accidental splashes.
- Apply Bonding Primer: Use a high-quality bonding primer designed for floors. Apply it using a roller or brush in thin, even coats. Let it dry completely—usually, 2 to 4 hours. Some products may require a second coat.
- Paint the Floor: Once the primer is dry, apply your floor paint using a roller for large areas and a brush for edges. Work in sections and follow the wood grain for a natural look. Apply 2–3 thin coats, letting each layer dry as per manufacturer’s instructions.
- Apply a Clear Topcoat: For extra durability, especially in high-traffic areas, apply a topcoat (like polyurethane or water-based floor sealer). This will protect your painted or whitewashed floor from scratches, moisture and cleaning chemicals.
- Cure Before Use: Allow the floor to cure fully before replacing furniture or walking on it—usually 24 to 72 hours. Use felt pads on chair and table legs to prevent premature wear.
How to Whitewash Hardwood Floors Without Sanding
Whitewashing is a subtler alternative to full paint coverage that allows some of the wood grain to peek through for a natural and airy look. It’s a perfect style uplift for period homes, coastal cottages, or Scandinavian-inspired interiors. The great news? You can get this effect without sanding your hardwood floors as well.
Begin with the same cleaning steps as described for painting. Once the floor is clean and primed (use a clear bonding primer), apply a whitewash stain or diluted white latex paint. Mix one part white paint with one to two parts water, depending on how opaque you want the finish.
Apply the whitewash solution using a lint-free rag or sponge mop. Work in small sections, applying a thin layer and then immediately wiping off the excess using a clean cloth. This technique helps more wood grain show through and gives you control over the intensity of the whitewash effect.
For an antique or weathered effect, you can vary the coverage and let some of the wood tones peek through. Once it dries, seal it with a clear floor-grade sealer to lock in the colour and protect the finish from wear.
Maintenance Tips for Painted or Whitewashed Floors
To keep your freshly painted or whitewashed floors looking beautiful for years, follow these maintenance tips:
- Use soft brushes or microfibre mops to clean regularly
- Avoid harsh cleaning chemicals; instead, use pH-neutral floor cleaners
- Place mats at entry points to reduce dirt and grit from shoes
- Use felt pads on furniture legs to prevent scratches
- Touch up any chips or scuffs promptly to prevent peeling
With these care techniques, your updated floors will remain a standout feature in your home’s design for many years to come—proof that you don’t need sanding to make a big impact.
Final Thoughts
Transforming your hardwood floors without sanding is not only possible—it’s efficient, stylish, and increasingly popular among UK homeowners and design professionals. Whether you choose a bold new colour or a subtle whitewash, this project offers impressive results with minimal mess and cost.
Skip the dust and disruption. With the right prep, high-quality products, and a clear plan, you'll achieve a floor makeover that enhances your space and reflects your personal style. So grab your roller and start your no-sand floor transformation today!
