At Flooring Mountain, we understand that installing a herringbone engineered wood floor is more than just a renovation—it's a statement of style and craftsmanship. With its elegant, interlocking pattern, herringbone flooring adds timeless charm, value, and sophistication to any space. Whether you're a DIY enthusiast or a professional looking for a refresher, this comprehensive installation guide will help you lay your herringbone engineered wood floor with confidence and precision.
What is Herringbone Engineered Wood Flooring?
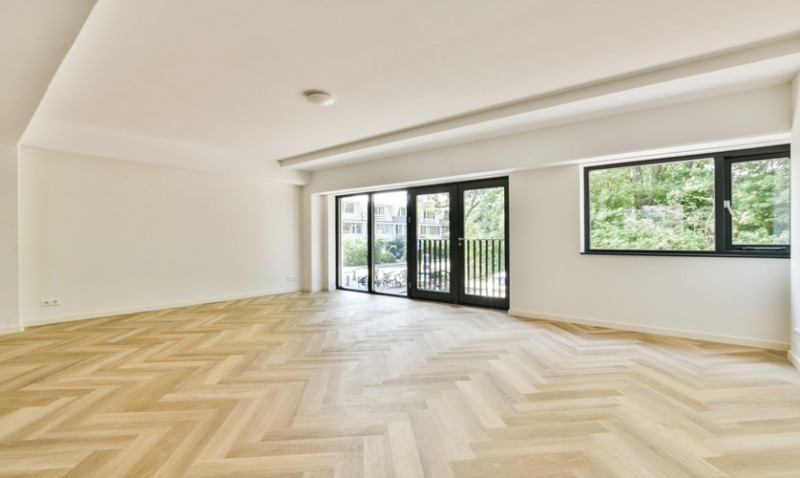
Herringbone engineered wood flooring is a bespoke flooring solution where planks are cut into equal-length rectangles and laid in a zigzag pattern that resembles the bones of a herring fish—hence the name. Unlike traditional straight plank layouts, herringbone offers a dramatic, geometric aesthetic that elevates both modern and classic interiors.
Engineered wood is constructed from a top veneer of real hardwood bonded to multiple layers of plywood or high-density fibreboard. This makes it more stable than solid wood, particularly in the UK's climate where fluctuating humidity levels can cause expansion and contraction in natural wood.
You can install herringbone engineered flooring in a range of finishes, species, and colours—from rustic oak to rich walnut—giving homeowners, architects, and interior designers the freedom to match the flooring to their project's theme.
Tools & Materials You'll Need
Before you begin installation, make sure you have the appropriate tools and materials on hand. A proper setup can save you time and reduce mistakes.
| Tools | Materials |
|---|---|
| Measuring tape | Engineered herringbone wood planks |
| Spirit level | Adhesive (if glue-down) |
| Chalk line | Underlay (for floating installation) |
| Notched trowel | Floor spacers |
| Rubber mallet | Expansion gap foam |
| Jigsaw or circular saw | Lacquer or oil (optional finish) |
Preparation Before Installing
A successful herringbone installation begins long before the first plank is laid. Proper preparation ensures your floor is level, clean, and conditioned to the environment of its new home.
Start by allowing your engineered herringbone flooring to acclimatise. Store the planks in their installation room, still in their packaging, for at least 48–72 hours before installing. This helps mitigate any expansion or contraction post-installation due to thermal and moisture changes.
The subfloor must also be clean, dry, and level. If you're installing over a concrete subfloor, ensure it's fully cured and within manufacturers' moisture tolerance (usually <2% CM). Use a self-levelling compound if necessary to create an even surface and avoid future instability.
If installing over an underfloor heating system, make sure to follow the heating system's manufacturer guidelines and ensure the heating is turned off at least 24 hours before and after installation.
Choosing the Right Laying Pattern
Traditional herringbone refers to a 90-degree pattern where the short side of one board connects to the long side of another, forming a staggered zigzag layout. However, variations like double herringbone, diagonal herringbone (45 degrees), or even chevron (V-pattern) are gaining popularity among UK homeowners and designers alike.
Sketch your planned layout on graph paper or use a digital floor planner to visualise the end result. Consider starting the pattern from the centre of the room or along a prominent focal wall to ensure the pattern stays symmetric as it moves outward. A measured and marked centre line is pivotal for keeping your layout square and visually consistent.
Installation Techniques: Glue-Down vs. Floating
With engineered herringbone flooring, there are two main installation methods—glue-down and floating. Your choice depends on the subfloor type, personal preference, and long-term durability goals.
Glue-Down Installation: This is the most common and recommended method for herringbone patterns. Using a notched trowel, apply a layer of wood floor adhesive directly onto the subfloor, laying the planks into place. This approach provides a firm, long-lasting installation and minimises movement over time.
Floating Installation: Some engineered floors come with a click-lock system, though less common for herringbone. Here, planks are connected to one another rather than to the subfloor and may include underlay for added insulation and sound dampening. However, this method is better suited to straight-lay patterns and may not provide sufficient stability for intricate herringbone designs.
Step-by-Step: How to Lay Herringbone Engineered Flooring
For those opting for glue-down (recommended), here’s a step-by-step breakdown:
- Mark the centre point: Use a chalk line to establish the centre of the room. This is where your first two planks will align.
- Dry lay your pattern: Before applying glue, dry-lay a small section of the flooring to ensure spacing and orientation are correct.
- Apply adhesive: Starting at your centre point, spread adhesive with a notched trowel in small sections (no more than you can lay in 20–30 minutes).
- Place planks in herringbone layout: Begin with your starter boards and work outward. Use spacers at walls to maintain an expansion gap of 10–15mm.
- Check for level and alignment: At regular intervals, use a spirit level and set square to ensure your planks are aligned and flat.
- Trim edges: Use a jigsaw or circular saw to carefully cut border planks to size. Consider adding a border frame for a professional finish.
- Allow to set: After laying all planks, avoid heavy foot traffic for at least 24 hours while adhesive cures.
- Final touches: Install skirting boards or beading, and apply any desired finishes (lacquer/oil) following the manufacturer's guidelines.
Tips from the Pros
- Always order 10–15% extra material to account for cuts, waste, and future repairs.
- Switch up plank bundles during installation to blend natural wood colour variations effectively.
- If you're unsure about starting points or angles, use a herringbone starter kit or set out a dry layout first.
- Hire a professional fitter for intricate borders, staircases, or unusually shaped rooms for optimal results.
Maintenance & Longevity
After installation, regular care ensures your herringbone engineered floor stays beautiful for decades. Sweep or vacuum regularly to prevent surface scratches. Use PH-neutral cleaners designed for wood and avoid excessive moisture.
Consider applying a periodic refresh coat depending on the finish type to protect the top veneer. Always use felt pads on furniture and avoid dragging heavy items across the floor.
With proper care, your herringbone engineered wood floor won’t just elevate your home—it'll last for generations, making it a lasting investment in British style and comfort.
Elevate Your Space with Flooring Mountain
At Flooring Mountain, we pride ourselves on offering premium-quality engineered herringbone flooring to suit every home and project. Whether you're working on a modern apartment in Manchester or a countryside villa in Cotswolds, our curated collection ensures superior performance and timeless design.
Shop online with confidence or speak to our flooring specialists today for personalised advice on pattern styles, finishes, and installation tips. Create bold and beautiful interiors with Flooring Mountain—your go-to source for herringbone engineered wood that makes a statement.
