If you’re looking to upgrade the look and feel of a space, whether it’s your garden shed turned workshop, your man cave, home office, or any room in your home, luxury vinyl plank (LVP) flooring offers an affordable, stylish, and highly durable solution. Thanks to its click-lock installation system and realistic appearance of wood or stone, LVP has become a favourite amongst DIY enthusiasts, interior designers, and tradesmen across the UK. In this guide, we'll walk you through the simple steps to install it yourself—with professional-looking results and no stress.
Why Choose Luxury Vinyl Plank (LVP)?
Luxury vinyl plank flooring offers the look and feel of real hardwood without the cost or maintenance. It's built to withstand high foot traffic, resists spills and scratches, and is even suitable for use in moisture-prone areas like sheds or utility rooms. Plus, modern LVP ranges come in a wide variety of styles—from rustic oak to herringbone parquet—making it easy to match your interior aesthetic.
It’s particularly appealing for a mancave or hobby space, where you want both practicality and personality. It’s also a top choice for home offices or rental properties due to its long-lasting performance. Whether you're an architect advising on low-maintenance surfaces or a homeowner taking on a weekend project, LVP ticks all the boxes.
Unlike laminate or hardwood flooring, many LVP options are waterproof, making them particularly suitable for sheds or converted garages often exposed to damp. And thanks to the cushioned backing found on many LVP products, it provides sound absorption and an underfoot comfort you won’t get with tiles or laminate.
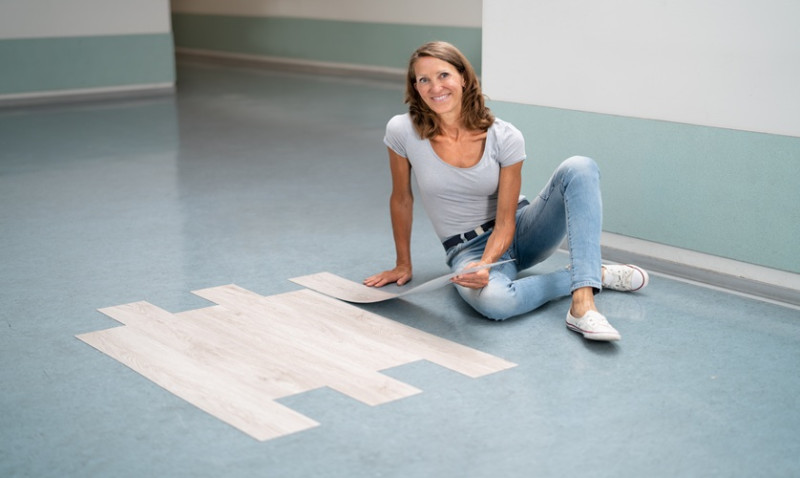
Another huge bonus: no glue, nails, or special tools required. Most modern LVP systems use a simple tongue-and-groove locking mechanism. If you can measure, cut, and click—you're qualified!
Tools & Materials You'll Need
Before you begin, it’s vital to gather the right tools and materials. Good preparation will save you time and make the job smoother from start to finish. Here's a list of essentials:
| Tool/Material | Purpose |
|---|---|
| Luxury Vinyl Planks | Your chosen flooring |
| Utility Knife or Vinyl Cutter | Cutting LVP to size |
| Measuring Tape | For accurate layout |
| Spacers | To maintain expansion gaps |
| Rubber Mallet | To secure plank joints |
| Set Square or Ruler | Ensure straight cuts and layout |
| Underlay (if required) | Soundproofing & moisture resistance |
| Floor Roller (optional) | Even out flooring once installed |
Preparing the Surface Correctly
For a successful and long-lasting installation, your subfloor needs to be clean, level, and dry. Remove any existing flooring, sweep thoroughly, and use a spirit level to check for bumps or dips. Any uneven areas more than 3mm over 1 metre should be levelled off using a self-levelling compound, available at most UK DIY stores.
For shed or outbuilding installations, make sure there's no moisture seeping through the ground. A good moisture barrier or damp-proof membrane is essential. If you're working over concrete, consider adding an underlay designed for LVP, which improves insulation and prevents mould growth.
If installing over tile, ensure there's no lippage or loose tiles. LVP is quite forgiving but works best on even, solid subfloors. Wooden floors must be stray nail- and screw-free before laying underlayment.
Before laying your planks, allow them to acclimate in the room for at least 48 hours. This allows the LVP to expand or contract based on room temperature and humidity conditions—especially important in British barns or garages where temperature swing is common.
Pro tip: Run a vacuum or damp mop before laying planks to remove any residual dust or debris that could hinder the locking system.
Layout and Design Tips for Visual Impact
Before you start clicking planks together, it’s smart to map out your layout. Decide which direction you want the planks to run—typically, planks are laid parallel to the room’s longest wall. For smaller areas like sheds or bathrooms, laying diagonally or across the width may make the room appear larger.
If you're going for a herringbone or chevron look, be aware that this pattern requires additional planning and precise cutting, but can give your space a high-end designer finish. Always start in a corner or straight reference line and dry-fit a few rows to ensure alignment.
Use spacers along walls to leave a 5–10mm expansion gap. This gap ensures your floor can breathe and avoids warping due to temperature or humidity changes—a must in most UK spaces with changing seasons.
Mix planks from several different boxes to avoid repeating patterns or colour shades. This will give your floor a natural, varied look similar to real wood.
How to Install the LVP – Step-by-Step
Here’s where the fun starts. Installation is typically a click-lock process that's straightforward and satisfying, even for beginners.
- Start with the first row along your longest wall. Use spacers to maintain the expansion gap.
- Click the short ends of the planks together. For the next row, engage the long side tongue into the groove of the plank in the previous row at a slight angle.
- Lower the plank and press down or use a rubber mallet to secure the joint. You should hear a satisfying “click.”
- Cut the last plank in each row to size using a utility knife – score it on the top, then snap it downward.
- Stagger your planks to create a natural wood appearance. Try not to line up joints more than three rows in a row.
- Continue row by row until the space is filled.
Once completed, remove the wall spacers and install your skirting boards or scotia beading to conceal the expansion gap.
A floor roller can be used across the surface to ensure all joints are firmly seated. Clean up any dust or residue, and voilà—you have a professionally-installed floor completed on your own!
Finishing Touches
After installation, leave the floor to settle for 24 hours before placing heavy furniture or appliances. Be sure to use felt pads under furniture legs to prevent dents or scratches.
If your flooring venture involves a mancave or recreational space, consider area rugs and ambient lighting to complete the vibe. Adding skirting boards or corner trims will give your DIY job a crisp, professional finish.
Luxury vinyl planks are incredibly easy to clean—just a soft broom or damp mop will do. Avoid harsh chemicals and steam mops, as they can compromise the floor locking system or wear down the built-in protective layer.
Conclusion: Anyone Can Install LVP – Why Not You?
Whether you're a design-savvy homeowner, a professional tradesman updating a client’s space, or a budding DIYer souping up your garden workshop, installing luxury vinyl plank flooring is one of the most gratifying home improvements you can tackle.
It’s cost-effective, easy to install, and looks incredible. Best of all, today's LVP is high-quality enough to rival real wood, but tough enough for everyday life in a British home. Grab your tape measure and get started—your dream floor is just a few clicks away!
Looking for the best luxury vinyl planks in the UK? Explore our full selection available with next-day delivery and expert support. You’ve got this.
