Luxury vinyl flooring has grown in popularity across the UK thanks to its resilience, aesthetic appeal, and ease of installation. One of the standout products in this category is the Floorify Click Luxury Vinyl Herringbone Flooring. With its stylish herringbone pattern and click system installation, it’s perfect for DIYers, architects, interior designers, and even professional tradesmen looking for a time-saving yet high-end finish.
In this blog post, we walk you through a detailed, beginner-friendly guide based on Floorify’s latest installation video. Whether you're a young professional redecorating your living space or a contractor working on a client’s project, this guide will help you achieve a beautiful, durable result.
Why Choose Floorify Click Herringbone Flooring?
Floorify offers a unique blend of practicality and luxury. Their click vinyl planks are waterproof, scratch-resistant, and provide a warm underfoot feel. The herringbone design, traditionally reserved for hardwood flooring, now comes in a vinyl format that combines elegant aesthetics with practicality.
What makes Floorify especially appealing to UK homeowners and professionals is its DIY-friendly click system. This means you don’t need adhesives or specialised tools—just a flat subfloor and patience. It’s a great way to elevate a hallway, lounge, or even kitchens and bathrooms without the mess or expense of traditional wood flooring.
The Floorify herringbone collection also comes in a variety of modern and classic wood tones, allowing designers and homeowners alike to find a finish that enhances their interior vision. For professional tradesmen, Floorify offers a functional yet beautiful solution that’s quick to install and built to last.
Tools & Materials You'll Need
Before beginning the installation process, ensure you have all the right tools on hand. Here’s a checklist to help you get started:
| Tool / Material | Purpose |
|---|---|
| Floorify Click Herringbone Planks | The main flooring material |
| Underlay (if needed) | Optional depending on subfloor and room use |
| Spacers | To maintain expansion gaps along walls |
| Utility Knife or Vinyl Cutter | For precision cutting of planks |
| Rubber Mallet | Helps secure click system joints |
| Measuring Tape | Ensure accuracy in layout |
| Pencil | Mark cuts and guide layout |
| Square Ruler or T-square | Helps with 90° angles in layout |
Having the correct tools ready will minimise disruption during installation and give you a more professional outcome.
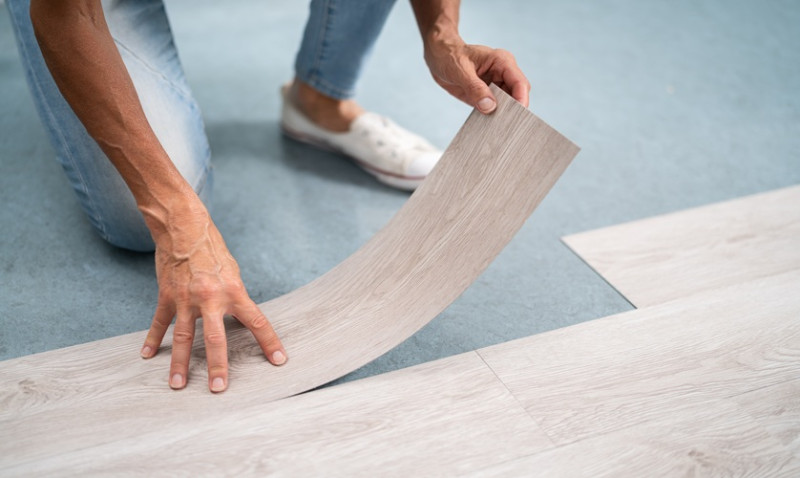
Step-by-Step Installation Guide
Here’s a simplified summary of Floorify’s official installation video, tailored for a UK audience. Whether you're working in a London flat or a suburban house in Manchester, the steps remain consistent.
1. Prepare the Subfloor
Your subfloor needs to be flat, clean, and dry. If it’s uneven, consider using a self-levelling compound. Remove any existing carpet or laminate, and vacuum thoroughly. Floorify flooring can be installed over concrete, wood, vinyl, and even certain types of tiles—but be sure to follow manufacturer guidelines.
2. Plan Your Layout
With herringbone flooring, layout planning is critical. Start by marking the central line in your room using a chalk line or measuring tape. This line will serve as your guide for the first row of tiles. Double-check the visuals: the V-shaped herringbone pattern should flow symmetrically from this line outward.
Dry-lay a few planks on the central axis before clicking them in permanently. This lets you visualise how the pattern will fit in the space and avoids awkward joins at walls.
3. Begin Laying the First Planks
Start from the centre of the room and work your way outward. Use spacers to maintain a 5-10mm expansion gap along all walls. Begin fitting one A plank with a B plank at a 90-degree angle to form the V shape. Use the click system to snap the planks into place—no glue required.
Ensure that each click is firm—use a mallet if needed to secure the joints gently. Repeat this process, forming each V pattern by alternating between A and B planks. Keep referencing your chalk line to ensure the pattern doesn’t drift.
4. Cut to Fit Borders
As you approach the edges of the room, take careful measurements and cut the planks using a sharp utility knife or vinyl cutter. Remember to factor in the expansion gap. Always make cuts from the back of the plank and wear gloves for safety.
5. Finish with Skirting or Beading
Once all planks are laid and locked, remove the spacers and install your skirting boards or scotia beading to conceal the expansion gaps. Avoid fixing skirting directly to the floor itself—attach to the wall instead to allow the floor to move naturally.
Clean the floor with a damp cloth and enjoy your new luxury flooring!
Top Tips from the Pros
- Let the planks acclimate in the room for at least 24 hours before installation.
- Use plenty of spacers to ensure a consistent expansion gap.
- Work in daylight or use strong lighting to clearly see plank joints.
- Always start from the centre if you're using a herringbone layout—it guarantees symmetry.
- Clean as you go to prevent dust or debris from getting into joints.
Following these insider tips will ensure your Floorify flooring looks like it was installed by seasoned professionals—even if you’re a first-time DIYer.
Ready to Transform Your Space?
With Floorify Click Luxury Vinyl Herringbone Flooring, you don’t need an army of specialists or weeks of upheaval to get the high-end look of wood parquet flooring. A single weekend and a bit of planning are all it takes to transform your living room, hallway, or commercial space into something truly special.
If you're based in the UK and looking to enhance your home's aesthetic or finish a client project with elegance and ease, Floorify's herringbone flooring is well worth considering. Durable, waterproof, easy to install, and visually striking—it ticks all the boxes for modern interiors.
Check out our product range and get started on your next design-forward flooring project today!
