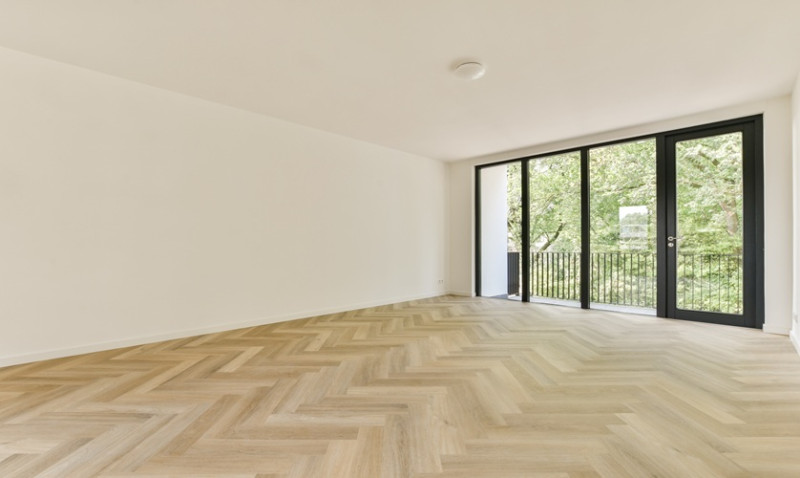
Engineered oak herringbone flooring has become a firm favourite among British homeowners, interior designers, and trade professionals. Combining the natural beauty of oak with the precision and durability of engineered construction, it delivers timeless style with practical benefits. The herringbone pattern, long associated with heritage properties and grand interiors, is now enjoying a strong revival in both period homes and contemporary settings.
This detailed guide explores everything you need to know about installing engineered oak herringbone flooring — from preparation and tools to lining up the first row perfectly. Whether you’re a DIY enthusiast with a passion for home projects, a professional tradesperson, or an interior designer planning a new project, this article is packed with insights tailored to a UK audience.
What is Engineered Oak Herringbone Flooring?
Engineered oak herringbone flooring is made up of individual planks constructed from layers of wood. The top layer is real oak, giving a stunning, natural finish; beneath this is a hardwood plywood core that gives the floor stability and makes it more resistant to changes in temperature and humidity (ideal for the UK’s unpredictable weather).
The “herringbone” refers to the pattern of laying. Instead of standard straight-laid planks, herringbone planks are cut to form zigzag formations, where each plank meets at 90 degrees with its neighbour. This geometric layout is both decorative and eye-catching — perfect for feature rooms like lounges, hallways, kitchens, or retail spaces in commercial environments.
Unlike traditional parquet blocks, engineered herringbone boards often come with tongue and groove edges or click systems, making installation faster and, in some cases, doable for confident DIYers.
Tools & Materials You’ll Need
Before beginning installation, make sure you've got all your tools and materials ready. Proper preparation is the key to a flawless, long-lasting result.
| Essential Tools | Materials |
|---|---|
| Tape measure | Engineered herringbone flooring planks |
| Flooring spacers | Adhesive (recommended by flooring manufacturer) |
| Chalk line/snap line | Moisture barrier underlay (if required) |
| Tapping block & pull bar | Scotia or skirting boards |
| Circular or mitre saw | Finishing oil or lacquer (if unfinished) |
| Spirit level | Flooring cleaner |
Depending on the subfloor and the installation method (float, glue-down, or nail), additional tools may include a notched trowel, PVA glue, or secret nailing equipment. Check with your supplier to confirm which installation methods are permitted for your particular product.
Preparing the Subfloor
This stage is often overlooked, but it’s crucial to get it right. Engineered wood may be more stable than solid wood, but it still requires a flat, dry, and clean surface to perform at its best over time.
Start by inspecting your subfloor, whether it's concrete, plywood, or even tiled. Ensure it’s level to within 2-3mm over a 2-metre area. Any dips or high spots may cause uneven planks or cause the click system to fail. Use levelling compound on concrete or replace/tighten loose boards if on wood.
Moisture can cause real problems with wooden floors. If you're installing over concrete, always test the moisture level with a reader — it should read below 75% RH (relative humidity). Installing a DPM (damp proof membrane) is strongly recommended under these conditions.
If you're floating the floor, lay down an appropriate underlay, potentially with a built-in moisture barrier and good acoustic insulation. This is particularly important in flats and upstairs areas to reduce noise transfer.
Planning the Layout: The Heart of a Great Install
A successful herringbone layout relies entirely on precision. Before installing anything permanently, take time to measure and mark out the plan using chalk lines.
The first decision is where to centre the pattern. In smaller rooms, people typically centre a full “V” (the zigzag peak) in the middle of the room for balance. In hallways or long rooms, it’s often better to align the herringbone pattern with the longest wall or follow the direction of light.
Use your chalk line to snap a centre line across your working area — usually running lengthwise through the room. Next, establish two additional lines that represent the 45-degree corners of the herringbone design. You’ll use these as your main guides when laying the first row of "header" blocks.
This step may take time, but as many flooring professionals stress, a small mistake here becomes massively magnified as the pattern continues across the room. Take your time and check everything twice.
Installing the First Row
The first row is critical. Begin by laying a starter “triangle” or square, which includes the first full ‘V’ shape. Use glue or the tongue-and-groove method (depending on your product), and ensure this starting unit is perfectly aligned with your chalk line guides. We highly recommend dry-laying a few rows first to visualise spacing and how cuts will fall at the edges of the room.
Use flooring spacers along the walls to allow for the expansion gap — typically 10-15mm around all edges. This ensures your flooring can expand and contract naturally, especially with underfloor heating or seasonal changes.
If you're glueing down the planks, work in small, manageable sections using your notched trowel. Only spread as much adhesive as you can use within 30 minutes, or it may begin to set before tiles are placed.
Press each block down firmly. Use a tapping block and rubber mallet where required, making sure all joints are tight and flat. Keep checking alignment — a small shift early on will distort the entire pattern later.
Laying the Remaining Floor
Once your first few rows are installed and set, continue working across the room. Always maintain reference to your chalk lines and check your pattern alignment frequently. Most engineered herringbone floors come with left- and right-sided planks — alternating these correctly is crucial to maintaining the pattern.
For each new block, apply glue (if glue-down) or connect the click system securely. If necessary, use clamps or weights temporarily to keep blocks in place while drying. Watch for adhesive creeping up between joints — wipe it clean before it hardens.
When you reach the walls, you’ll need to make precise cuts to fit the remaining planks into place. Always measure several times and make test cuts on offcuts if needed. Using a mitre saw helps ensure sharp, clean finishes.
Finishing Touches: Trims and Protection
With the flooring now laid, you’ll want to complete your installation professionally. Remove wall spacers and install new, matching skirting boards or scotia trims to cover the expansion gap. Be careful not to fix skirting directly onto the floor — it must allow the boards to move slightly beneath it.
If your flooring is prefinished, you may only need a light clean to remove surface dust. If it’s unfinished, apply your preferred protective layer (oil or lacquer), following the product guidance for drying time and reapplications.
Use appropriate felt pads under furniture legs and avoid placing rugs or mats immediately — give the floor time to settle and cure, especially if adhesive or finish has been applied recently.
Maintenance Tips for Engineered Oak Herringbone Flooring
After installation, proper maintenance will keep your herringbone floor looking stunning for decades.
- Clean regularly using a soft-bristle brush or vacuum with a felt head to avoid scratching.
- Use a damp (not wet) mop with a specialist wood floor cleaner. Avoid all-purpose cleaners or steam mops, which can damage the finish and wood layer.
- Control room humidity levels between 40%–65% to prevent warping or gapping.
- Use doormats at entrances to reduce dirt and gravel coming into contact with the floor.
Engineered oak is more forgiving than solid wood, but it still benefits from care and attention. Many products allow for sanding and refinishing if needed in the future, depending on the thickness of the wear layer.
Why Engineered Herringbone Is a Smart Choice
In terms of value, engineered herringbone offers a premium look without the drawbacks of solid wood. With improvements in manufacturing, today's products offer excellent authenticity, warmth underfoot, and improved performance over underfloor heating systems.
For professionals, it adds sophistication to any specification. For DIYers, the satisfaction of tackling a challenging but beautiful project is well worth the effort.
So, whether you're renewing a tired Victorian hallway, modernising a minimalist flat, or specifying finishes for a boutique interior, engineered oak herringbone ticks all the boxes — style, practicality, and timeless appeal.
Now that you know what to expect, measure up, source your ideal herringbone floor from a trusted UK supplier, and start planning your perfect installation today.
