When we decided to restore the original hardwood flooring in our 1930s semi-detached in Birmingham, we had one goal in mind: To bring back the timeless charm of real wood underfoot. Like many DIY homeowners in the UK, we’d seen the countless glossy “before and after” photos online and figured, “How hard could it be?” As it turns out – harder than we thought. Refinishing hardwood floors is part art, part science, and totally unforgiving to mistakes. For anyone embarking on the same journey, here’s what we learned the messy, noisy, slightly disappointing way.
Lesson 1: Underestimating the Time and Labour
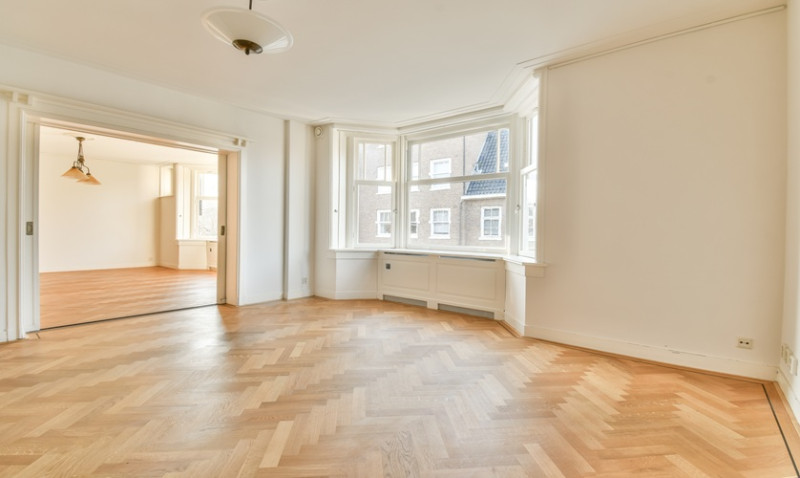
We began with high hopes and a bank holiday weekend. We figured three days was more than enough time to rent the sander, get the floors stripped, and apply a beautiful new finish. But the reality quickly set in: refinishing hardwood floors is seriously hard graft. Between furniture removal, prepping the room, actual sanding, cleaning up the seemingly endless dust, and multiple dry times between coats – it became clear we were in over our heads.
If you’re thinking of tackling this as a DIY project, double your time estimates. Each step – from edging to filling cracks – takes longer than it appears on YouTube. And if you have multiple rooms or intricate edges, forget your weekend plans entirely.
Professionals do it faster for a reason – they’ve got the tools, skills, and muscle memory. If you’re not in excellent physical shape or don't love crawling on your knees for hours, consider hiring a floor restorer. Your back will thank you.
Lesson 2: Not All Sanding Jobs Are Equal
Using a drum sander for the first time is like driving a powerboat in your living room. It’s aggressive and can cause serious damage if mishandled. We learnt quickly that letting it sit too long in one place can gouge your floor – something we now see every time the light hits just right.
We also didn’t realise how many passes would be necessary. The old varnish was thick, possibly oil-based from decades ago. Add to that uneven boards and decades of grit ground deep into the grain, and we were looking at at least three passes with different grit levels just to prep the wood for finishing. And yes, we missed spots.
Edging – the part of sanding where you cover corners and tight spots– was even worse. Our hire sander lacked dust control and made it nearly impossible to see what we were doing properly. It’s worth investing in or renting pro-level gear with effective dust extraction systems. Trust us: your lungs and floor will benefit.
Lesson 3: Overlooking Floor Repairs & Gap Filling
Hardwood floors, especially in older UK homes, often come with years of wear and age-related damage. We were so eager to dive in that we didn’t do a detailed inspection of the boards before sanding. We later discovered loose nails, deep gouges, a couple of cracked planks, and various gaps between boards that made applying finish more complicated than expected.
Gap filling, particularly, was tricky. Some online forums suggested using a mix of sanding dust and resin to create a filler blend, but ours ended up cracking after drying. We eventually had to redo it with a commercial wood filler imitating oak grain. It’s worth researching a gap-filling method suitable for the movement that UK homes commonly experience due to seasonal humidity.
Also, squeaky floorboards can often be tightened with screws from below or nailed down properly before sanding. Once sanded and sealed, repairing them becomes ten times harder. Small preparation tasks save massive frustration later.
Lesson 4: Choosing the Wrong Finish
After labouring for hours over a spotless sanded finish, we wanted a matte, Scandinavian-style oil finish. Unfortunately, we bought a cheaper hardwax oil that faded unevenly and felt sticky even after three days. Worse, it didn’t bring out the natural grain richness we hoped for.
This is where doing your homework counts. There are dozens of hardwood finishes in the UK market—from polyurethane and lacquers to natural oils and hybrids. Each varies in durability, maintenance needs, VOC (volatile organic compound) levels, and how it enriches the wood’s colour. We recommend testing at least 2-3 finishes on a spare board or darker corner to compare the impacts before going all in.
Also, mind the odours. Some oil-based finishes give off fumes that aren’t ideal in homes without proper ventilation or if you're sharing the space with kids or pets. If you’re finishing indoors, consider eco-friendly, low-VOC water-based sealers. They might be pricier but dry faster and smell less pungent.
Lesson 5: Dust Everywhere… and Staying There
It’s hard to overstate the amount of dust that comes from floor sanding. Despite sealing vents and doorways with tape and plastic sheets, dust managed to travel everywhere – including upstairs and inside closed cabinets. Our mistake? Not using a dustless sanding system and failing to clean between every sanding pass.
Each grit of sandpaper pulls up a different level of debris, and failing to thoroughly vacuum between stages can result in dust getting trapped under your sealant. This creates a grainy, uneven finish that resembles sandpaper — ironic, considering the hours we spent sanding.
A few practical tools made a difference on our second go: a HEPA-filter vacuum, tack cloths (for picking up ultra-fine particles), and microfibre mops. We now do a full clean between every step. It adds hours but delivers professional-looking results – or at least closer to it.
Costs vs. Expectations
In our heads, we had budgeted around £150-£200 for everything. Reality? Closer to £500, once you factor in sander hire (three different machines, over four days), multiple grades of sandpaper (which wears out quicker than you’d think), wood fillers, brushes, fixatives, test pots, polishes, and a pro-level vacuum cleaner.
A quick reference of approximate costs:
| Item | Estimated Cost (GBP) |
|---|---|
| Floor Sander Hire (3 days) | £90 |
| Edge Sander Hire | £40 |
| Sandpaper (Various grits) | £60 |
| Wood Filler | £25 |
| Finish (Hardwax Oil / Varnish) | £50–£100 |
| Protective Gear (Masks, Goggles, Gloves) | £30 |
| Vacuum & Cleaning Supplies | £80 |
Of course, hiring a professional can cost upwards of £25–£40 per square metre, so DIY still offers savings. But be realistic. This is not a £50 makeover with leftover gear.
So, What Did We Learn?
Would we do it again? Yes — but smarter. Our floors look decent, not showroom-perfect, but certainly better than the yellowed ageing varnish we started with. Now, we know what to expect. Understanding preparation, choosing the right tools, and realistic scheduling made all the difference from our first blunder-filled attempt to the final results we’re proud of.
For young professionals, design-minded renovators, tradesmen and architects based in the UK, here’s the takeaway: sanding and refinishing hardwood floors is not impossible, but it definitely demands planning, savvy purchases, and honest expectations. If you’re going for that gorgeous minimalist aesthetic or preparing a home for resale – then the details matter.
There’s huge satisfaction in saying “we did this ourselves.” But also – no shame in tagging in a pro where needed. Sometimes, doing it right is better than doing it yourself.
Thinking of Refinishing Your Floors?
Before you hire out or dive in yourself, consider your goals, timeline, and the realistic finish you expect. If your time is limited or your floor has special value or heritage timber (like parquet or reclaimed oak), professional help may be the best investment. But if you're ready to roll up your sleeves and understand the learning curve — there's no thrill quite like restoring a classic British hardwood floor to its former beauty.
