When it comes to achieving a sleek, stylish, and hard-wearing floor without the hefty price tag of stone or hardwood, luxury vinyl tile (LVT) is a top contender. Whether you're a hands-on DIY enthusiast, a design-forward young professional, or a seasoned interior specialist, LVT offers an ideal balance between performance and aesthetics. Even better, installing it yourself is entirely achievable with the right preparation and guidance.
In this guide, we’ll walk you through everything you need to know to plan, learn, and build your perfect luxury vinyl tile floor. From subfloor prep to final finishing touches, this comprehensive yet easy-to-follow tutorial is tailored to UK homeowners, designers, and tradespeople alike.
1. Why Choose Luxury Vinyl Tile?
LVT is one of the best flooring choices for modern homes and professional spaces due to its combination of durability, waterproof characteristics, and authentic appearance. Designed to mimic natural materials like stone, ceramic, and hardwood, LVT brings luxury to spaces without the complications of traditional materials.
For UK homes dealing with damp climates, underfloor heating systems, and a wide range of traffic areas, LVT consistently outperforms alternatives. It’s ideal in kitchens, hallways, bathrooms, and even retail or hospitality environments.
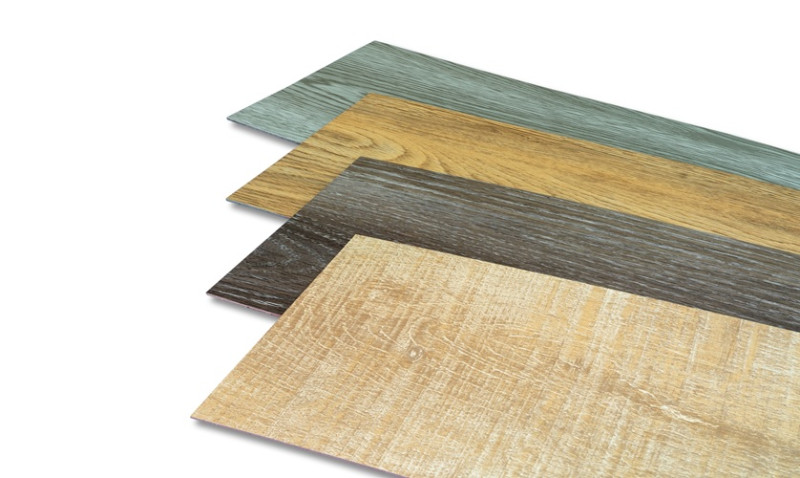
The flexibility of LVT also drives its popularity among interior designers and architects. Its availability in an array of styles, colours, and textures means it fits seamlessly into virtually any design scheme – modern, farmhouse, traditional or minimalist.
Whether you're updating a London flat or transforming a countryside cottage, LVT delivers on both performance and flair.
2. Planning: What You Need Before You Start
As with any renovation project, proper planning is key. Taking the time to measure and prepare your space will make the installation smoother and help you avoid costly mistakes or mid-project delays.
Begin by measuring your room as accurately as possible. Record the length and width in metres, and multiply these values to calculate the area in square metres (m²). Always add 10% extra when ordering your LVT to accommodate cuts and potential waste.
Next, decide whether you’ll opt for a click-lock (floating) system or a glue-down option. Floating LVT is easier for DIY projects since it doesn’t require adhesives. However, glue-down LVT is often preferred by pros for its sturdier finish and suitability over larger or commercial areas.
Don’t forget to factor in expansion gaps, underlay (if using a floating system), and any special trims for doorways or transitions to other types of flooring.
3. Tools and Materials Checklist
| Tools | Materials |
|---|---|
| Utility knife | Luxury vinyl tiles |
| Measuring tape | Underlay (if floating installation) |
| Spirit level | Adhesive (if glue-down) |
| Chalk line or laser level | Floor primer (for glue-down on porous subfloors) |
| Rubber mallet | Spacers (for expansion gaps) |
| Tapping block and pull bar (for click systems) | Dust sheets and gloves |
Make sure you gather all your tools and prepare your space. Clear the area of furniture, sweep or vacuum thoroughly, and double-check for any moisture or level issues in the subfloor.
4. Subfloor Preparation
A level, dry, and clean subfloor is critical when installing LVT. Even minor imperfections can cause tiles to lift, shift or show bumps over time. Survey the floor for any dips, cracks or protrusions.
If you’re laying over concrete, test for moisture. This is particularly relevant in basements or ground-level rooms in the UK where rising damp is a possibility. Any signs of moisture must be addressed using membranes or moisture barriers.
When laying over wooden subfloors, ensure the boards are secure, level, and free from creaks or movement. Consider overlaying plywood to create a smoother finish for glue-down installations.
For click-lock LVT, underlayments provide cushioning and acoustic benefits. Choose underlay products compatible with vinyl tile – some types, such as thick foam used for laminate, can damage LVT over time.
5. Laying Out and Planning the Design
Think of this phase as the blueprint stage. Dry laying the panels before fixing them gives you the opportunity to visualise the layout and plan any adjustments to minimise awkward cuts or narrow tile slivers at the edges of your room.
Start from the most visible wall or centre of the room, depending on your layout goals. For authenticity, especially with wood-look LVT, stagger the planks in a brickwork or random pattern to replicate real wood’s natural variation.
Use a chalk line to mark your starting line and ensure tiles remain square as you progress. Verify alignment as you go, particularly if you're working around features like fireplaces, kitchen islands, or alcoves.
Always mix tiles from different boxes to create a more realistic, varied look. This prevents patterns or colour differences from becoming concentrated in one area.
6. Installation: Glue-Down vs Click-Lock LVT
Two primary methods govern how LVT tiles are installed – glue-down or floating with click-lock edges. Each method suits different scenarios and skill levels.
Glue-Down Installation
Perfect for high-traffic commercial spaces or larger areas, glue-down LVT requires adhesive applied either to the floor or to each tile’s back. This method results in a more firm, stable floor built to last for decades.
Before gluing, apply a suitable primer if laying over a porous subfloor. Use a notched trowel to spread the adhesive, then carefully press each tile into place following your starting line. Use a roller to ensure full surface contact and remove air bubbles.
Click-Lock Installation
Click-lock LVT (also called floating LVT) is ideal for residential spaces and DIYers. These tiles snap together with tongue-and-groove edges, meaning no glue or nails are required. It’s quick, clean, and less permanent, making it a great choice for rented properties or future updates.
Lay the tiles in a staggered pattern, using spacers along your walls to allow for expansion. Use a tapping block and rubber mallet to gently fuse pieces together without damaging the joint locks. Don’t forget to leave an expansion gap of around 5-10mm on all perimeter walls – this allows for seasonal changes in temperature and humidity.
7. Finishing Touches and Clean-Up
Even expert installations fall flat without proper finishing. Once the tiles are fully laid, install skirting boards or scotia trims to conceal expansion gaps. Avoid pinning trims into the tiles; fix them to the wall instead.
If you removed any doors, shave them down slightly if needed to accommodate the slight height increase of your new floor – especially when paired with underlay.
Clean the entire floor using a pH-neutral cleaner suitable for vinyl. Avoid abrasive scrubbing or steam cleaning, particularly for glued-down floors, until the adhesive has fully cured (usually 48 hours).
Lastly, keep a few spare tiles stored safely. These may come in handy for replacing damaged areas in the future without redoing the entire floor.
8. Maintenance Tips to Keep Your LVT Looking Great
With the installation done, maintenance is a breeze. Sweep regularly with a soft broom and mop weekly using a damp (not wet) mop. Thanks to its durable wear layer, LVT resists staining and scuffs, but furniture pads and entry mats will help reduce wear and tear.
Never use wax-based products or polishes, and avoid dragging heavy furniture across the floor. For homes with underfloor heating, ensure the system operates under 27°C as per most manufacturers' guidelines.
When treated with care, luxury vinyl tile offers excellent value and beauty for well over 20 years – making it one of the smartest flooring choices for UK homes and commercial spaces alike.
Final Thoughts
Installing LVT is not just a cost-effective way to bring exceptional style and comfort to your interiors – it’s also empowering. By planning properly, learning the right techniques, and building with care, you can achieve professional-quality results, no matter your level of experience.
As always, be sure to follow manufacturer recommendations, check your specific product's installation guidelines, and don't hesitate to consult a professional if you hit a snag. With a little patience and precision, your new luxury vinyl tile floor will elevate your space for years to come.
