Wood floors bring timeless charm and warmth to any home. Whether it's a Victorian townhouse in London, a converted warehouse flat in Manchester, or a countryside cottage in Yorkshire, wooden flooring remains a top choice for its durability and beauty. However, even the most well-maintained wood floor isn’t immune to scratches. From furniture legs scuffing the surface to pet claws and high heels leaving their mark, scratches are an inevitable part of wooden floor life.
Luckily, fixing scratches doesn’t always require a full floor re-sanding or professional help. With the right products and a little know-how, you can restore your wood floor’s beauty in just a few easy steps. This guide is crafted for DIY enthusiasts, busy young professionals tuning up their space, tradesmen wanting to assist clients, or even interior designers aiming to protect their vision. Let’s walk through how to fix scratches on wood floors – quickly and easily.
Understanding the Type of Scratch
Before reaching for any repair kit, it’s vital to assess the type and depth of the scratch. Not all scratches are created equal – some only damage the finish, while others cut deep into the wood itself. Depending on the severity, the method of repair will vary significantly.
There are generally three categories to watch out for:
- Surface or Light Scratches: These affect only the finish or top coat. They're often caused by dirt, grit underfoot, or pet claws.
- Minor Wood Damage: Still shallow, but enough to scrape the surface finish and dig into the wood slightly. Usually from furniture being moved without pads.
- Deep Gouges or Dents: Typically caused by dropping heavy objects or constant high-traffic wear. These often require more effort and may need filler or replacement strips.
Once you’ve identified the scratch type, you can choose the right fix. Let’s move to solutions that work for each level of damage.
How to Fix Light Surface Scratches
Surface scratches can usually be buffed out without much fuss. Here are the steps:
- Clean the area: Use a soft microfibre cloth with a gentle hardwood floor cleaner (avoid vinegar-based solutions as they can dull your finish). Remove any dust or debris, as rubbing over dirt can cause more scratches.
- Use a blending pencil or crayon: Available in various wood tones at UK hardware retailers like B&Q, Wickes and Screwfix, blending crayons fill in surface scratches, making them disappear instantly. Rub along the grain.
- Buff gently: Use a dry cloth to remove excess filler and polish the area.
- Apply a floor polish or wax: This helps protect the area and blends the repair into the rest of the floor. Always use a formula compatible with your floor’s finish.
These simple steps are often enough to refresh your flooring and erase light blemishes without needing professional tools or products.
Dealing With Minor Wood Scratches
When a scratch goes slightly into the wood but hasn’t gouged deeply, you’ll need to take slightly stronger action.
- Clean thoroughly: Again, start with a clean, dry surface.
- Use a proprietary floor repair marker: Brands like Ronseal or Bona offer wood-coloured repair markers and fillers. Get the closest match to your floor stain. Apply following the grain direction and allow to dry.
- Optional: Add a wax stick: If the marker alone doesn’t fill the scratch adequately, press a wax stick (also sold in wood tones) into the groove then buff away the excess wax.
- Protect with clear finish: Dab a touch of polyurethane or lacquer over the repair with a small artists' brush to lock in the fix.
Many of these easy-to-use solutions are budget-friendly and available from UK specialist stores and online suppliers such as Toolstation, Amazon UK, or your favourite local flooring shop.
Fixing Deep Scratches or Gouges
Deeper damage requires a more involved repair. This is best done if you have some DIY confidence but still doesn't necessarily call for expensive tradespeople.
- Clean out the scratch: Vacuum and wipe with a damp cloth to clear debris. If the wood fibres are raised, sand softly with 240-grit paper, always along the grain.
- Fill with wood filler: Use a wood filler that matches your floor colour exactly. Apply with a plastic putty knife and press into the gouge level with the surface. Let this dry thoroughly as per the manufacturer’s instructions.
- Sand gently: Once dry, lightly sand the surrounding area to make it flush with the floor surface. Take care not to scratch the surrounding finish.
- Stain and seal: Use a stain pen or matching oil-based stain to colour match the surrounding area, then apply a protective coat of lacquer, varnish or floor wax.
For engineered floors or oiled finishes, be extra cautious – some products won’t adhere well to oiled wood. When in doubt, consult your flooring manufacturer's instructions or local flooring expert.
Regular Maintenance to Prevent Future Scratches
After putting in the effort to repair your wood floor, maintenance helps prevent future damage. Good habits go a long way toward keeping your floors looking brand new.
Here is a basic maintenance checklist:
| Tip | How It Helps |
|---|---|
| Use protective pads under furniture | Prevents sharp legs from scratching when moved |
| Keep floors clean | Dirt and grit act like sandpaper on your floor’s finish |
| Re-oil or re-wax regularly | Maintains a protective finish that resists wear |
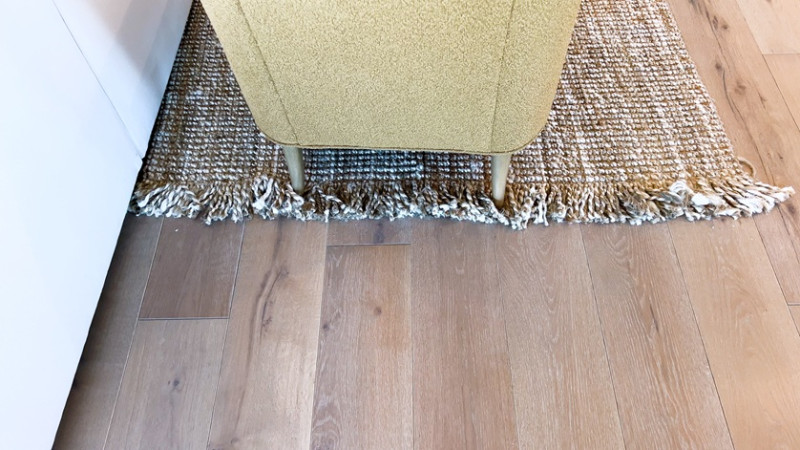
| Use rugs in high traffic areas | Reduces daily wear, especially in hallways and entranceways |
| Trim pet claws | Stops scratch marks from excited paws |
Routine touch-ups with polish or maintenance oils can further prolong your floor’s life. Consider using a buffing pad every few months to refresh and protect the finish.
When Is It Time to Call a Professional?
While many scratches and scuffs can be fixed at home, there are times when you’ll need a professional floor finisher:
- If damage is widespread or covers a large area
- If your floor has warped or splintered boards
- If the scratch exposes raw wood on varnished floors
- If the repair attempts don't blend well with your floor’s stain
UK homeowners can find reputable floor specialists via trade organisations like the National Institute of Carpet and Floorlayers (NICF) or TrustMark-registered businesses. Getting a floor properly sanded and refinished can restore even well-worn wood to showroom-ready condition.
Conclusion: Beautiful Floors Are Within Reach
Scratches on wood floors are almost unavoidable – but that doesn’t mean they have to stick around. With the right approach based on the type of scratch, you can easily repair most surface flaws yourself. Whether you're patching things up before guests arrive for a dinner party or just staying on top of home improvements, these simple methods can save time, money, and your beautiful flooring.
Keep a few essential repair tools in your DIY kit, and you’ll be ready to keep your floors looking fantastic for years to come. Happy fixing!
