Oak engineered flooring is a popular choice among homeowners, designers, and trade professionals in the UK. Its impressive combination of durability, style and ease of installation makes it ideal for a range of modern and classic interiors. However, over time, even oak engineered floors may require a refresh – and sanding followed by refinishing is often the best solution. Whether you’re a DIY enthusiast tackling your first floor project or a professional preparing for a client job, understanding how to properly sand and finish engineered oak flooring is essential.
Can You Sand Oak Engineered Flooring?
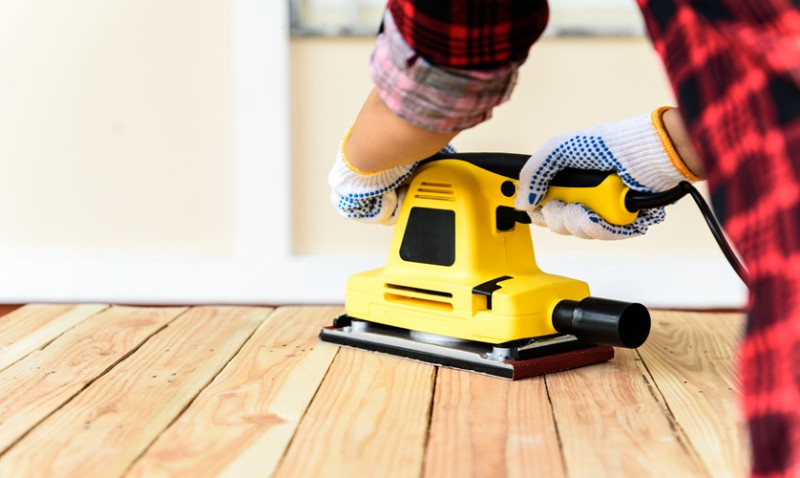
Yes, oak engineered flooring can be sanded – but only to a certain extent. Unlike solid oak flooring, engineered boards are made with a hardwood top layer (known as the wear layer) and a plywood base. It’s this wear layer thickness that determines how many times the floor can be sanded before reaching the stability layer beneath.
Most engineered oak flooring comes with a wear layer between 2mm and 6mm. If you have a 4mm or thicker wear layer, sanding once or twice over the lifetime of the floor is safe. However, if you're unsure how thick the layer is, it's wise to consult the manufacturer or a flooring specialist before proceeding with sanding.
It’s also important to note that aggressive sanding techniques or heavy-duty machines can reduce the lifespan of your engineered floor. Whether you're doing it yourself or hiring a professional sander, ensure the equipment used is suitable for engineered flooring and that minimal sanding is done to preserve as much of the wear layer as possible.
Why Sanding Is Sometimes Necessary
There are several reasons why sanding your oak engineered floor might become necessary:
- Surface Wear and Tear: In busy households or commercial settings, scuffs, scratches and dents naturally accumulate over time.
- Discolouration: UV exposure, cleaning agents, and general age can all cause the top layer's original stain or colour to fade.
- Desire for a New Finish: If you're redecorating your home or revamping a property, sanding gives you the freedom to change the finish to better suit your updated interior design.
- Water Stains or Surface Damage: Accidental spills, pet accidents or water ingress can leave stubborn marks that can only be removed by sanding.
Ultimately, sanding gives your floors a fresh start and allows you to apply a modern or more suitable finish that will both protect and beautify the oak veneer.
Choosing the Right Finish for Oak Engineered Flooring
Once you've sanded your engineered oak floor, selecting the right finish is crucial for both aesthetics and protection. The UK market offers various types of finishes, and your choice should be based on how the space is used, the look you’re after, and your maintenance preferences.
Oil-Based Finishes
Oil-based finishes penetrate deeply into the wood, enhancing its natural grain and creating a warm, organic look. They offer good wear resistance and are easier to patch repair than other finishes – ideal for high-traffic areas or family homes with pets and kids.
The two most popular oil-based finishes for engineered oak are hardwax oil and penetrating natural oils. Hardwax oils (like Osmo Polyx or Blanchon Hardwax Oil) leave a subtle sheen and feel natural underfoot, while still providing excellent protection against liquids and dirt.
A key advantage with oils is ease of maintenance. While scratches may show more easily, you can often repair spots locally without needing to re-sand the entire room. However, oil finishes require more regular maintenance coats over the years to keep them looking fresh.
Lacquered Finishes (Varnish)
Lacquer is a surface-level protective coating that forms a hard seal over the top of the oak flooring. It offers a glossy or satin appearance and is highly durable, making it a go-to option for commercial or high-use areas such as hallways and kitchens.
Lacquers like Bona Mega or Junckers Strong provide excellent longevity and are less susceptible to spills and stains, which is helpful for homes with lots of activity. However, if the finish gets visibly scratched or loses its sheen over time, you will likely need to re-sand and refinish the entire area rather than just touch up one spot.
For those who want a "low-maintenance" finish, lacquer is the better long-term solution, though it often sacrifices that tactile, natural look and feel that many homeowners love about wood.
Stains and Colour Oils
If you want to change the appearance of your oak flooring beyond just clear protection, stains and colour oils are the way to go. These can add anything from whitewashed tones to deep greys and rich walnuts. When using a stain, it’s usually applied after sanding and before sealing with either oil or lacquer.
Make sure to test stains on offcuts or an inconspicuous area before full application, as the underlying oak's tone can significantly affect the final appearance. Many UK brands like Morrells, Fiddes, and Treatex offer a broad range of colour options perfectly suited to current interior trends.
Comparing Different Wood Finish Options
| Type of Finish | Appearance | Durability | Maintenance | Touch-up Friendly | Best For |
|---|---|---|---|---|---|
| Hardwax Oil | Natural, Matt/Satin | Moderate - High | Regular top-ups | Yes | Living Rooms, Bedrooms |
| Natural Oil | Rustic, Matt | Moderate | Frequent maintenance | Yes | Traditional Interiors, Low Traffic Areas |
| Lacquer/Varnish | Glossy or Satin | High | Minimal | No | Hallways, Kitchens, Offices |
| Colour Oil/Stain + Seal | Custom Colour | Depends on top coat | Average | Yes (oil) / No (lacquer) | Decorative Themes, Statement Floors |
Tips for Applying Your Chosen Finish
Once you’ve selected your finish, it’s time to apply it properly. Here are some key best practices:
- Clean Thoroughly Post-Sanding: Vacuum dust and wipe with a damp cloth before applying anything.
- Use Quality Tools: High-quality brushes, rollers, or floor pads help achieve a professional-level result.
- Apply Thin, Even Coats: More isn't better. Multiple thin coats are more effective and aesthetically pleasing.
- Allow Full Drying and Curing Time: Follow the product’s instructions. Don’t rush placement of furniture or rugs as this can scar the surface.
- Ventilate Well: Ensure you have good airflow during the application and drying process, especially with oil-based products.
Conclusion – Getting the Perfect Finish
Sanding and refinishing your engineered oak flooring can rejuvenate your interior space, increase property value, and personalise your home to your taste. Whether you prefer the silky touch of hardwax oil, the toughness of lacquer, or the visual drama of a tinted stain, there's a finish to suit your needs and lifestyle.
For UK homeowners, DIYers, and design pros looking to invest in longevity and style, taking the time to choose the right finish will ensure your engineered oak flooring continues to impress for years to come. Don't forget to factor in both function and form – a well-finished floor adds more than beauty; it creates lasting comfort and reliability beneath your feet.
