Sanding your wooden floors can seem like a daunting task, especially if you’re doing it yourself. Luckily, with the right approach and tools—like an orbital sander—you can refresh and rejuvenate your flooring with professional-looking results. Whether you're a young homeowner tackling your first redecorating project or a seasoned tradesperson aiming to refine your knowledge, understanding how to use an orbital sander effectively is a game-changer for any floor renovation project.
Why Choose an Orbital Sander for Floor Sanding?
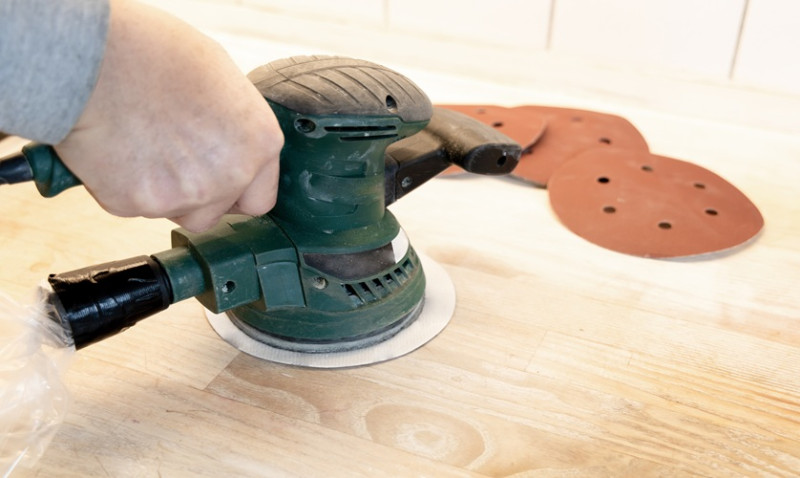
Orbital sanders are popular among both DIY enthusiasts and professionals because they are easy to control, less aggressive than drum sanders, and versatile for smaller or more detailed jobs. These tools are ideal for light to medium sanding jobs and are particularly effective for refinishing hardwood floors without gouging the surface.
Unlike more aggressive belt or drum sanders, orbital sanders move in a consistent circular motion, minimising the risk of damaging delicate floorboards. This makes them an excellent choice for those new to sanding or working on softwood floors such as pine or fir that can be easily damaged by more aggressive sanding machines.
Another big advantage is dust control. Many orbital sanders come with built-in dust collection systems or attachments for a vacuum, which helps reduce mess and keeps the work environment cleaner. For home renovators and designers working in occupied or partially renovated spaces, this feature is particularly useful.
For professionals working on smaller residential projects, orbital sanders are also more portable and lightweight compared to larger commercial machines. Their easy handling makes them ideal for edges, corners, and tight spaces, which are often difficult to reach with bulkier equipment.
Preparing Your Floor Before Sanding
Before you begin sanding, it’s crucial to prepare your floor properly. Start by thoroughly cleaning the floor. Remove all furniture, rugs, and debris. Sweep, vacuum, and mop the area to ensure it’s free of dirt and small particles that could interfere with the sanding process or damage the sander.
Next, inspect the floor for nails and screws that may be sticking up. These should be countersunk below the surface to prevent damage to your sander or injury during use. For older floors, you may also need to check for loose boards or large gaps that should be repaired or filled before sanding.
If the floor has an existing finish (like varnish or paint), consider using a slightly coarser grit to start your sanding. Keep in mind that orbital sanders are not designed to remove extremely thick layers of finish, so if your floor is heavily coated or uneven, multiple passes or a preliminary sanding with a more robust machine might be needed.
Choosing the Right Sandpaper Grit
One of the keys to successful floor sanding is selecting the appropriate sandpaper grit sequence. Generally, you'll want to start with a lower grit to remove old finishes and smooth out imperfections, and then gradually move to higher grits for a finer, polished finish.
| Floor Condition | Starting Grit | Intermediate Grit | Finishing Grit |
|---|---|---|---|
| Worn or heavily finished floors | 36–40 | 60–80 | 100–120 |
| Moderately worn floors | 60 | 80 | 120 |
| Light refurbishment/new floors | 80 | 100 | 120–150 |
Always remember to vacuum between each grit change and inspect the floor to ensure consistent sanding. Skipping grits or moving on too quickly can leave scratch marks or uneven textures, especially visible after staining or varnishing.
Proper Technique for Using an Orbital Sander
Begin sanding slowly and methodically, working in sections. Move the orbital sander in overlapping passes, going with the grain of the wood whenever possible. Keep the sander flat and avoid tipping it, which can cause uneven spots. Let the weight of the sander do the work; don’t apply too much pressure, as it may damage the floor or overload the motor.
For best results, sand the room in a logical sequence—either by working from one end to the other or sectioning the space into manageable zones. This ensures you maintain an even sanding pattern without missing areas.
If you're sanding parquet or floors with varying grain directions, you may occasionally need to sand at an angle or across the grain, but follow with a pass along the grain using a finer grit to smooth out any scratches.
Don’t forget the edges and corners. While orbital sanders can get relatively close to the walls, for the tightest areas, you may need to use a detail sander or sanding block to achieve a uniform finish throughout the entire space.
Dust Management and Safety Tips
Orbital sanders generate a lot of dust, even with a vacuum attachment. To maintain a clean and safe workspace, seal off doorways and heating vents before you start. This helps contain the dust within the room and avoids spreading it throughout your home.
Use a high-powered shop vacuum with a HEPA filter to keep dust levels under control. Vacuum not only the floor between sanding stages but also windowsills, ledges, and baseboards, where dust tends to collect.
In terms of personal protection, always wear a dust mask (preferably P2-rated), safety goggles, and ear protection. Orbital sanders can be surprisingly loud, especially in empty rooms where sound echoes.
After Sanding: What’s Next?
Once sanding is complete, wipe the floor down with a tack cloth or lightly dampened microfiber cloth to remove any remaining dust. From here, your floor is ready for finishing. Depending on your style and preference, you can apply a clear varnish, a stain-plus-sealant combo, or even natural oil finishes.
Make sure the room is well-ventilated when applying finishes, and always follow the manufacturer's instructions for drying times between coats. Don’t rush the sealing process—a well-finished floor will not only look better but will also last far longer with proper care.
Consider applying a primer coat before staining to ensure an even colour tone, especially with softer woods that tend to absorb stain unevenly. Professionals often sand lightly with a high grit (150–180) between finish coats to achieve a silky-smooth result.
Final Thoughts
Using an orbital sander for floor sanding can be remarkably effective when done correctly. Whether you’re revitalising a Victorian terrace in Leeds or finishing a new build in Surrey, mastering this tool provides a valuable skill for anyone working with wood flooring.
From its forgiving nature with beginners to its precise touch appreciated by professional tradesmen and interior designers, the orbital sander is a worthy addition to any toolbox. Invest in good quality sanding discs, take the time to prep your floors thoroughly, and don’t be afraid to take it slow—great results come from attention to detail and patience.
Happy sanding!
