Thinking about revamping your home’s wooden floors? If you're dealing with oak flooring, staining it correctly can completely transform the look of a space – adding warmth, character, or even a sleek and modern aesthetic. In this expert-backed guide, we share professional insight gained from working on over 2,000 oak floors. Whether you’re a DIY enthusiast, an interior designer, or a professional tradesperson, this blog will walk you through every phase of the oak floor staining process – clearly and confidently.
Why Choose Oak Flooring?
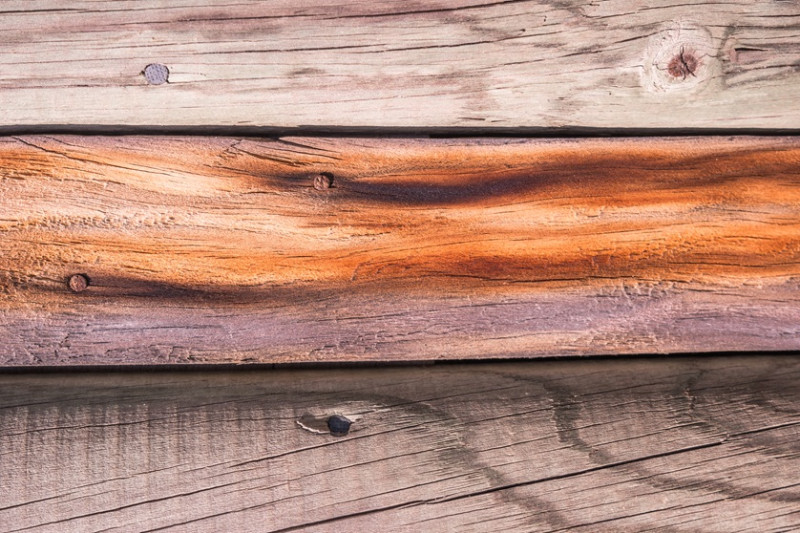
Oak is a timeless choice for flooring in UK homes. It's loved by professionals and homeowners alike because of its durability, versatility, and attractive grain pattern. Whether it's solid or engineered oak, the wood accepts stain beautifully and offers a consistent finish. Thanks to its tight grain structure and medium porosity, oak can be customised through staining to produce anything from light Scandi tones to rich, dark contrasts seen in period-style interiors.
Another benefit is oak’s long-lasting reputation. A well-maintained oak floor can last for decades, making it a smart long-term investment – something especially important when you're planning home improvements involving significant time and resources.
From a design point of view, the neutrality of oak also makes it suitable for a wide range of settings – from contemporary apartments in London to restored cottages in the Lake District. Its adaptability is part of the reason our experts continue to recommend oak after restoring or installing more than 2,000 floors across the UK.
But staining and finishing oak requires precision, especially if you want to avoid patchiness, blotching or damage to the wood’s surface. That’s why we recommend following a professional process like the one outlined below.
Essential Tools & Materials You’ll Need
Before diving into the staining process, it’s crucial to gather the correct tools and materials. Using the right tools not only ensures safety but also gives you the cleanest and most consistent results.
| Tool/Material | Purpose |
|---|---|
| Orbital floor sander | Removes old finish and prepares surface |
| Edge sander | For sanding perimeters and corners |
| Vacuum cleaner | Removes fine dust between steps |
| Wood stain (oil-based or water-based) | Changes the floor's colour/tone |
| Lint-free cloths or foam applicators | For applying stain evenly |
| Protective varnish or lacquer | Seals the stain and protects the wood |
| PPE (mask, gloves, goggles) | Protects your health and safety |
If you don’t own a floor sander, you can hire one from your local tool hire centre. Just make sure it's serviced and suitable for oak floors – as older or aggressive sanders could damage the grain.
Step-by-Step: How to Stain an Oak Floor Like a Pro
Staining may seem simple, but it’s a fine balance between technique, material quality, and timing. Follow the step-by-step process below, used by our experienced team in hundreds of UK homes.
1. Preparation & Sanding
Start by removing all furniture and masking off adjoining areas such as skirting boards and door frames. Thorough preparation is crucial to avoid any accidental staining or dust contamination.
Next, sand the entire floor using an orbital or drum sander. Begin with 36 or 40-grit sandpaper to remove old finishes, scratches, and blemishes. Then progress to finer grits – 60, 80, and finally 100 or 120. Your goal is to create a smooth, raw wood surface ready to absorb the stain evenly.
Don’t forget to sand the edges and corners using an edging sander or hand-held sanding tool. After sanding, vacuum the entire area and wipe down with a damp (not wet) cloth to remove any remaining dust particles.
2. Test the Stain on a Small Area
Always – and we mean always – test your chosen stain on a small, inconspicuous section of floor or leftover oak plank. Oak can accept stain differently depending on its grain structure, age, or ambient humidity.
This quick test can save you from disastrous results. Compare different stain types (oil-based vs water-based), and remember that water-based stains dry faster and emit fewer fumes, which is ideal for small UK properties or balconies where ventilation is limited.
3. Apply the Stain Evenly
Once the test looks perfect, it’s time for full application. Work in small sections – ideally row-by-row following the grain of the boards. Use either a foam applicator, roller or lint-free cloth. Professionals generally recommend applying stain with a cloth for best penetration and control.
Keep a steady pace. Don’t stop halfway, as this can lead to mismatched tones. Apply the stain evenly and allow time for it to absorb before wiping off the excess with a clean cloth. This technique helps manage blotching, which is especially important on oak.
Remember to ventilate the space thoroughly during this process. Use fans, open windows, and wear appropriate protective equipment to avoid inhaling fumes.
4. Let It Dry Completely
Drying times for stains vary depending on product type, room temperature, and humidity. Typically, oil-based stains need 12–24 hours to cure, while water-based options may take just 2–6 hours.
Patience here pays off. Rushing to apply a sealant or masking over the floor too soon can seal in moisture, leading to blistering or bubbly finishes. Touch a hidden part of the floor with your knuckle to test tackiness before proceeding.
5. Seal the Deal – Apply Your Varnish or Finish
Once dry, it's time to protect the stained oak floor with a suitable finish. Professionals favor polyurethane or lacquer-based finishes for their durability, especially in high-traffic areas. If you prefer a more natural look, hardwax oils might be ideal, though they require more maintenance over time.
Apply two to three coats, lightly sanding between coats with 240–320 grit paper. Vacuum between each coat to remove dust. Allow the final coat to dry for at least 24 hours before moving furniture back in.
Common Mistakes To Avoid (From 2000+ Floor Jobs)
Having stained over 2,000 oak floors, we've seen just about every mistake possible. Avoid these, and your results will stand out:
- Skipping grit levels during sanding – leads to scratch marks that absorb more stain and create dark patches.
- Staining before proper dust removal – the smallest particles can leave surface bumps and affect stain distribution.
- Starting with no test patch – can lead to unexpected shades that might not suit your décor.
- Failing to ventilate – especially with oil-based stains, fumes can build up fast. Always work in a well-ventilated area.
- Over-applying the stain – causes bloating and sticky surfaces. Wipe away excess after letting the stain absorb for 5–10 minutes.
Final Thoughts From Our Floor Specialists
Staining oak flooring may seem like a daunting process, but it’s one that can be mastered with the right preparation and approach. The deep satisfaction of bringing a worn oak floor to life with a fresh tone can make all the effort worthwhile – and adds real value and visual appeal to your property.
If you're ever unsure about any phase – from sanding equipment to finish selection – don’t hesitate to consult a flooring specialist. We offer remote consultations across the UK and can even recommend trusted local professionals if the DIY route feels too risky.
Have more questions about staining your oak floors? Drop your queries in the comments below or contact our expert team directly. We’d love to assist – whether you're updating a city flat or working on a bespoke renovation project!
Looking for Ideas? Inspiration Awaits
Need help choosing a stain colour? Want to see how certain finishes look in real homes across the UK? Browse through our Floor Makeover Gallery of Pro Talks to watch a full walkthrough of the process with visuals and expert commentary.
And don’t forget to subscribe to our monthly newsletter – where we share tips and trends for hardwood flooring, staining guides, design inspiration and exclusive offers for UK homeowners and design professionals.
