Hardwood floors are a timeless and elegant choice for homes and commercial spaces alike. However, over time, layers of wax, polish, and cleaning products can build up, leaving your beautiful hardwood floors looking dull, sticky, or cloudy. Whether you're a DIY enthusiast ready to take on a weekend project, a tradesman tackling a restoration job, or a designer refreshing a client's space, knowing how to safely remove hardwood floor wax is essential.
Wax removal must be handled carefully to prevent damaging the wood beneath. Harsh chemicals or improper techniques can cause discolouration, warping, or irreversible damage. Thankfully, with the right tools and methodical approach, you can restore your floor’s natural beauty without putting your investment at risk.
In this guide, we’ll take you through everything you need to know about stripping wax and polish buildup from hardwood floors. From choosing the right products to detailed step-by-step instructions, we’ve got you covered.
Understanding Hardwood Floor Wax and Product Buildup
While wax is often used to give hardwood floors a glossy finish and layer of protection, repeated applications over the years can lead to buildup. Combined with oils, cleaning sprays, and polishes that aren't always compatible with waxed finishes, a sticky residue can develop — leading to a cloudy, dull surface that attracts dirt instead of repelling it.
Modern floors are often sealed with polyurethane finishes, which shouldn’t be waxed at all. Applying wax or polish over these types of floors can hinder the floor’s natural sheen and create an uneven or slippery surface. Recognising the finish type on your floor should always be the first step before any cleaning process.
Buildup can also occur from everyday product misuse — such as using oil-based cleaners, soap-based liquids, or multipurpose sprays not intended for hardwood. These products can mix poorly with floor wax or sealants, compounding the issue.
Being able to identify and strip away these layers safely will help ensure any refinishing or simple cleaning work looks professional and consistent.
What You'll Need for Wax Removal
Before you begin, gather the necessary tools and materials. Having the right equipment will help to make the job smoother and more efficient. Below is a list of recommended items:
| Item | Purpose |
|---|---|
| Mineral Spirits or Wax Remover | Dissolves wax and buildup without damaging the wood |
| Microfiber Cloths or Terry Towels | Gentle material for scrubbing and cleaning wooden surface |
| Plastic Scraper | Helps lift built-up wax gently without scratching |
| Bucket with Warm Water | Used for rinsing cloths and helping clean the surface |
| Rubber Gloves | Protects your hands from chemicals |
| Floor Buffer (optional) | Speeds up large scale stripping jobs |
Ensure your workspace is well-ventilated, especially when using products like mineral spirits. Open windows, use fans, and avoid open flames or sparks nearby as some cleaning agents can be flammable.
Step-by-Step Guide: How to Remove Wax Build-Up
Follow these simple steps to safely strip away wax and grime while preserving the integrity of your hardwood floor:
1. Test in a Small Area First
Before committing to stripping the entire floor, pick an inconspicuous corner or under a piece of furniture to test your wax remover. Apply a small amount of mineral spirits or commercial wax remover with a cloth and gently rub. If the surface dulls and wax begins lifting, you’re on the right track.
2. Work in Sections
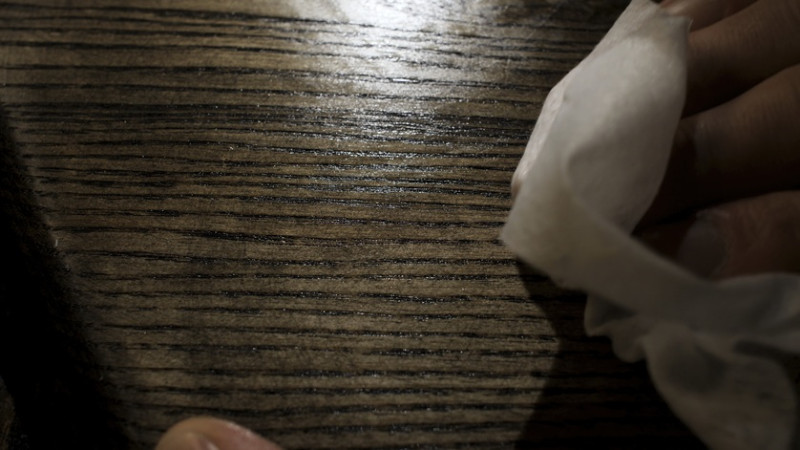
Divide the floor into manageable sections (e.g., 1m² at a time). Apply a small amount of mineral spirits onto the cloth — not directly on the floor — and gently rub the surface in a circular motion. You’ll notice the cloth starting to pick up old wax and residue.
3. Use a Plastic Scraper on Stubborn Areas
In spots where wax is heavier, you may need to gently scrape with a plastic scraper. Avoid metal tools which can gouge or damage the wood. Stick to the grain of the wood for best results.
4. Wipe Clean with Warm Water
Once wax is removed, go over the area lightly with a damp (not wet) cloth to lift any leftover residue. Avoid drenching the floor as excessive water can damage hardwood. Dry the section completely with a clean towel.
5. Repeat as Needed
Continue this process across each section of the floor. You may need several passes in areas that have seen a lot of product buildup over the years. Patience is key — working slowly will prevent mistakes and ensure superior results.
For very large spaces or commercial jobs, consider hiring or renting a low-speed floor buffer with a soft-bristle pad to apply and remove wax remover across wider areas more efficiently.
Aftercare: How to Maintain Your Freshly Cleaned Hardwood Floors
Once the wax is fully removed, you’ll likely notice your floor looking a little matte or bare. This is normal — it's the natural finish of the wood without any sealing layers. At this stage, you can decide to either leave the wood in its raw, natural state or refinish it with a polyurethane coat or new compatible polish or wax.
If you choose to re-wax, don't use modern oil-based polishes or silicone-based products that can cause future buildup. Look for high-quality, professional-grade wax specifically designed for wood flooring. Alternatively, many UK homeowners and designers now opt for hardwax oils or natural sealants that enhance grain without creating sticky layers.
Going forward, make sure to use only compatible cleaning products for your chosen floor finish. Avoid vinegar and water or soap-based cleaners on sealed floors — these can degrade the finish over time and lead to haze.
What If Your Floor Isn’t Responding?
If you’ve tried these steps without success, your floor may have layers of varnish or contaminants that require sanding or a professional-grade stripping agent to remove. In such cases, it might be worth consulting a flooring specialist who can assess the finish, wood type, and recommend deeper restoration techniques.
Architects, interior designers, and tradesmen dealing with period properties or heritage flooring should always approach wax stripping with extra caution. Finishes found in older homes may contain traditional shellac or lacquer that should not be disturbed without proper testing.
Don’t forget to check with your flooring manufacturer if you’re working on a newer prefinished hardwood floor — many have specific care guidelines and warranties that require certain procedures.
Conclusion
Removing hardwood floor wax and product buildup doesn’t have to be overwhelming. With careful technique and the right materials, you can safely strip away old residue and restore your floors to their natural brilliance. Whether you’re flipping a property, updating a living room, or polishing your client's studio flat in London, following these expert tips will make a clear and lasting difference.
At the end of the day, clean and well-maintained hardwood floors not only elevate the appearance of a space, but they also add long-term value. Give your floors the care they deserve — and they’ll thank you by staying beautiful for years to come.
