If you’re looking to create a truly standout interior, herringbone flooring is a stylish and timeless choice. Loved for its elegance and long-standing heritage in British interiors, the herringbone pattern has made a major comeback in modern homes. Whether you're a keen DIY enthusiast, a first-time homeowner redecorating your space, or a professional looking to refresh your knowledge, this detailed guide will walk you through how to lay herringbone flooring like a pro.
What Is Herringbone Flooring?
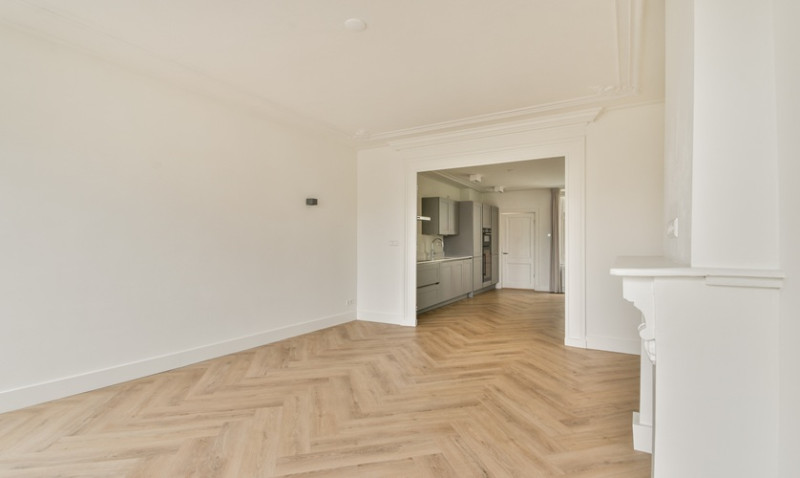
Herringbone flooring is a type of parquet design where rectangular planks are laid in a zigzag pattern, resembling the bones of a herring fish — hence the name. Traditionally laid using solid wood blocks, modern herringbone floors can also be installed using engineered wood, luxury vinyl tiles (LVT), and laminate alternatives.
The pattern’s visual appeal lies in its symmetry and structure. It creates a luxurious sense of movement and texture, adding depth to even the simplest rooms. Plus, it works across a range of interior styles, from period properties to more contemporary spaces often found in urban flats across cities like London, Manchester, and Edinburgh.
Choosing herringbone flooring also enhances property value, making it a great investment for anyone looking to upgrade their interiors with resale in mind.
Before we start laying planks, there are a few key steps in planning and preparation you should be aware of, whether you're tackling the project yourself or coordinating with a tradesperson.
What You'll Need: Tools and Materials
The right tools and materials will make a world of difference. Here's what we recommend having on hand before beginning your herringbone flooring project:
| Tool / Material | Purpose |
|---|---|
| Herringbone flooring planks (engineered, laminate, LVT, etc.) | Your chosen type of flooring for installation |
| Adhesive (if using glue-down method) | To fix the planks securely to the subfloor |
| Underlay | For floating floors or extra insulation |
| Spacers | To maintain expansion gaps |
| Tape measure | Essential for precise measuring |
| Chalk line or laser level | Helps layout the perfect centre line for alignment |
| Mitre saw or circular saw | To cut planks at required angles or lengths |
| Rubber mallet | To gently tap planks into place |
| Spirit level | To check flooring levels throughout |
Step 1: Preparing Your Subfloor
The quality and longevity of your flooring starts with your subfloor. Make sure your subfloor is:
- Dry and completely cured (especially important if working over a new concrete screed)
- Level, with no dips or bumps — use a levelling compound if necessary
- Clean and free from dust, debris, or previous adhesives
- Structurally sound with no movement underfoot
If you're installing onto a wooden floor like floorboards or plywood, check for squeaks or loose boards and secure them with screws. For concrete subfloors, a damp-proof membrane may be required — especially in older UK properties where rising damp can be an issue.
Laying the correct underlay is crucial if you're floating your floor or using laminate or LVT. Choose underlays with moisture resistance and good acoustic properties to suit the room's use, especially in flats or upstairs spaces.
Step 2: Planning the Layout
The most essential part of herringbone flooring is getting the layout right — once it's glued or locked in place, adjustments are difficult. Follow these layout tips for professional-grade results:
Start by identifying the centre of your room. Use a chalk line or laser level to draw a centre line. Most installers recommend beginning the herringbone “v” (often referred to as a chevron or apex) along this line, with one half of the pattern to the left and the other to the right.
Dry-lay a few rows along this centre line. This isn't a step to skip — it helps you visualise how the final pattern will look and identify any issues before adhesive or locking mechanisms come into play. Don’t forget to factor in borders or trims near walls or around doorways.
Decide whether you want a full plank at the edge or a cut piece. Most pros centre the pattern so the cuts are even on both sides of the room for symmetry — ideal for period homes with strong architectural lines.
Step 3: Starting the Installation
With your subfloor prepped and layout sorted, it’s time to begin installation.
For glue-down flooring (engineered, hardwood or LVT), apply adhesive with a notched trowel just a small section at a time — don’t cover the whole floor at once as it may dry before you get there. Align your first planks along your centre line, forming the perfect V. Use spacers to maintain an expansion gap around all edges of the room (usually 10-15mm).
For click-lock engineered timber or LVT, begin with your starter row using manufacturer instructions, clicking each plank into position with the proper angle and pressure. Use a mallet and fitting block for clean installation if necessary.
Work slowly and check alignment constantly. A minor deviation early on can cause a staggered, lopsided pattern that worsens as you progress. Using a set square regularly helps ensure accuracy while locking in herringbone’s trademark geometry.
Step 4: Trimming and Edging
As you approach walls or permanent fixtures like fireplaces and kitchen units, you’ll need to trim the planks. Use a mitre saw or jigsaw to make clean cuts and create neat finishes. This is where your measurements are critical — a tight but not forced fit helps prevent lifting or movement over time.
Introduce border planks as required. Many designers and architects recommend framed border pieces — laid at 90 degrees to the herringbone pattern — to create a crisp, high-end look that suits both traditional and modern interiors across the UK.
Your last perimeter cuts should still maintain an expansion gap, hidden neatly beneath skirting boards or edge trims. In retrofits, you may want to remove and then replace skirting boards for a seamless look. Otherwise, use a floor beading to cover any visible gaps.
Step 5: Finishing Touches
Once your flooring is laid, allow any adhesives to cure fully before walking or bringing in furniture — typically 24 to 48 hours depending on products used. Keep the room well ventilated during this time.
Clean your new floor with a damp cloth and suitable floor cleaner — do not soak, especially with real wood flooring. Now is also a great time to add felt pads to furniture legs and roll out rugs to protect your new pattern from scratches and scuffs.
If you’re using unfinished timber, you’ll need to apply your oil, wax, or lacquer of choice as a final protection method. Always follow the product guidelines to avoid discolouration or uneven texture.
Done right, herringbone floors don’t just look beautiful — they wear well for years and become a conversation piece in any home or commercial space.
Final Thoughts
Laying herringbone flooring may seem complex, but with the right planning, tools, and patience, it’s a highly rewarding DIY project. It's an instant way to add style and value to your property, no matter if you live in a countryside cottage in Kent or an urban flat in Birmingham. The key lies in precision and preparation — take your time, and your results will speak volumes.
If DIY isn’t quite your thing, or your time is tight, many professional flooring fitters in the UK are experienced with herringbone installations. Still, knowing the process puts you in a strong position to assess quality and discuss your design goals with confidence.
Considering a herringbone layout in your next renovation? Let us help you source premium planks, the right tools, and expert advice every step of the way. Your perfect floor is just a few steps away.
