Herringbone pattern tiles are fast becoming one of the most popular choices for floors and walls across UK homes, new developments, and stylish renovations. With roots in classic European design, the herringbone pattern offers a timeless and elegant aesthetic that instantly elevates the space. Whether in kitchens, bathrooms, hallways or even feature walls, the striking zigzag layout brings depth, movement, and a touch of luxury.
If you're a DIY enthusiast, young professional planning a renovation, or a professional designer or tradesperson looking for a reliable how-to, this blog post will walk you through the process of installing herringbone tiles. We’ll cover everything from preparation and layout to cutting techniques and finishing touches, helping ensure your herringbone tiling project is a success.
What Is the Herringbone Tile Pattern?
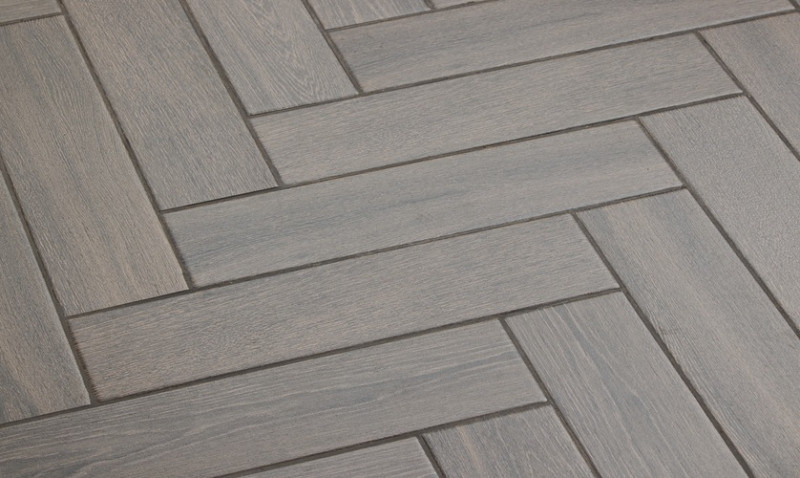
The herringbone pattern consists of rectangular tiles – typically metro tiles or wood-effect planks – laid in a zigzag format, resembling the bones of a fish, hence the name. Each tile is placed at a 45° or 90° angle to the next, creating a V-shaped pattern that interlocks across the surface.
There are variations of the herringbone layout, including classic 45-degree patterns, stacked herringbone (tiles aligned vertically or horizontally) and double herringbone. It’s commonly used with smaller format tiles for walls, and longer plank-form tiles for floors. This aesthetic bridges the gap between classic and modern design, making it ideal for the UK’s diverse interior styles – from traditional Victorian townhouses to minimalist city flats.
While it looks intricate, with careful planning and patience, the herringbone pattern can be achieved at home or by a professional. Getting it right, however, requires more precision than standard straight tile layouts – so preparation is key.
Tools and Materials You'll Need
Before starting the installation, make sure you have the right tools and materials to ensure a smooth and professional-looking result. Here's what you'll need:
| Tool/Material | Purpose |
|---|---|
| Tile cutter or wet saw | Precise cuts, especially important for angle fitting in the herringbone format |
| Tile adhesive | Fixes tiles to the prepared surface (check it’s suitable for the surface type) |
| Notched trowel | Evenly spreads the tile adhesive |
| Tile spacers | Maintains even grout lines |
| Spirit level or laser level | Ensures tiles stay in line and level |
| Pencil and tape measure | For accurate marking and measurements |
| Grout and float | For finishing between the tiles |
| Tile trim (optional) | For neat finishing around edges |
When working with heavier tiles like porcelain or ceramic floor tiles, or larger formats, you might also benefit from a suction-cup lifter to handle them without damage. For bathrooms or wet areas, always opt for waterproof adhesive and grout to maintain long-term durability.
Preparing the Surface
Start with a clean, level surface. Any bumps or unevenness will disrupt the layout and could prevent tiles from sitting flush, potentially leading to future cracking or lifting. If the surface isn’t perfect, use a self-levelling compound – available in most UK DIY stores – to smooth floor or wall areas before you begin tiling.
Next, remove any dust, loose debris, or old adhesive. Walls may need to be primed, especially if they’re new plaster, to help bond the adhesive. For floors, ensure they’re dry and rubble-free. If you’re tiling over existing tiles (a common practice in UK renovations), rough up the surface lightly with sandpaper for better grip.
Also remember to consider underfloor heating systems under herringbone floor tiles – many UK homes benefit from these additions, particularly in bathrooms and kitchens. Make sure the heating system is switched off before installation and checked for compatibility with your chosen adhesive.
Planning Your Herringbone Layout
Proper planning is everything. Lay out a dry-run of your tiles on the floor without adhesive. Find the centre of the space you're tiling – use a chalk line or laser level to mark a central axis that will help guide your layout. Herringbone tiles look best when the pattern is symmetrical and centred.
You’ll want to begin the tile pattern from the middle or a feature point (like directly under a kitchen hood or in the centre of the hallway) and work out towards the edges. This helps prevent awkward small tile slithers at the edges and ensures a visually pleasing, balanced look.
For wall applications, you may need to batten (fix) a wooden plank temporarily to hold tiles in line since they will slide with gravity before the adhesive sets. This is common for vertical herringbone designs in kitchens and bathrooms.
A common technique used by professionals is to create a “starter block” made of a piece of plywood with tiles laid out in the herringbone arrangement – this helps you get the angles, spacing, and adhesive application just right before committing to the full surface.
Laying the Herringbone Tiles
Apply tile adhesive to a working area using your notched trowel. Don’t cover too large an area at once to avoid adhesive drying out. Begin placing tiles using your layout guide, ensuring your first few tiles are aligned correctly, as everything else will follow from them.
Remember, you're working with geometry here – each tile needs to sit at the same angle as the last to preserve the V-shaped pattern. Most tilers use a spirit level to keep everything in line, but a laser level makes it faster. Ensure that the long edge of one tile intersects perfectly with the short edge of the next at a 45-degree angle.
Use tile spacers between tiles to maintain even grout lines. If tiles slide, adjust them immediately before the adhesive begins to set. Take extra care at the edges and corners – this is where you’ll need to cut tiles to maintain the pattern, and precision is key.
Don’t rush. Herringbone is slow to lay compared to basic stacked patterns due to more cutting and alignment. Work in small sections and periodically step back to evaluate the layout. This ensures you spot any misalignment before it becomes a bigger problem down the line.
Cutting Tiles for the Herringbone Pattern
Cutting tiles correctly can make or break a herringbone installation. You’ll be making lots of angular cuts – especially 45-degree mitres – to fit pieces around edges, sockets, and corners. Here, a tile cutter or compact wet saw becomes your best friend.
Always measure twice before cutting and dry-fit the cut tile to make sure it sits perfectly before fixing in place. Mitre guides or angle measurement tools can help achieve uniformity for diagonal corner pieces.
For irregular edges such as around a door frame or pipe, consider using a tile scribe or nippers. These allow you to carefully shape tiles without breakage, which is especially important for porcelain or natural stone finishes that chip easily when not handled properly.
Safety first: always wear safety goggles and gloves when cutting tiles!
Grouting and Finishing Touches
Let the tile adhesive cure fully depending on manufacturer instructions – typically 24 hours. Once cured, it's time to grout. Mix your grout to a peanut butter-like consistency and use a rubber float to press it into the joints diagonally, ensuring full coverage between each tile.
After about 10–15 minutes, use a damp sponge to wipe away excess grout from the tile surface. Work in circular motions and rinse the sponge frequently. Once dry, polish the tiles with a microfiber cloth to remove any residual haze.
Choose your grout colour wisely. A matching grout offers a subtler look, while a contrasting grout emphasises the herringbone pattern. In the UK, grey grout is particularly popular for metro herringbone walls, while a warm beige grout works well with wood-effect floor tiles.
Finish the edges using tile trim or by smoothing over the grout line with a silicone bead (particularly useful in wet zones). This seals and protects the tile edges from moisture and completes the look professionally.
Herringbone Tiles: A Stylish Return on Investment
It’s no surprise that so many UK renovators, DIYers and design professionals are embracing the herringbone trend. Whether you're modernising a Victorian townhouse in London or adding warmth to a Glasgow flat, herringbone tiles provide a sleek impact that never goes out of style. Better still, because the look is both classic and high-end, it can even add value when selling or renting out your home.
Remember, patience and planning are critical in achieving the best results. With the right tools, a well-prepared surface, and the step-by-step guide above, you can master the art of the herringbone tile installation and create an eye-catching interior you’ll be proud of.
If you're still weighing up your tile options or looking for supplies, explore our full range of metro, wood-effect, and porcelain tiles, as well as adhesives, tools, and accessories. We ship across the UK and offer expert support if you need it!
