If you're looking to add timeless elegance and a touch of craftsmanship to your living space, few flooring options match the visual charm of herringbone oak parquet. This classic flooring pattern is making a strong comeback in UK homes—from trendy city flats to traditional country houses—and for good reason. Herringbone oak parquet flooring offers sophistication, durability, and unparalleled character.
Whether you're a DIY enthusiast renovating your first home, a young professional updating your interiors, an architect specifying materials for a client, or a seasoned tradesperson looking to refresh your knowledge, this guide will walk you through every step of the installation process.
What is Herringbone Oak Parquet Flooring?
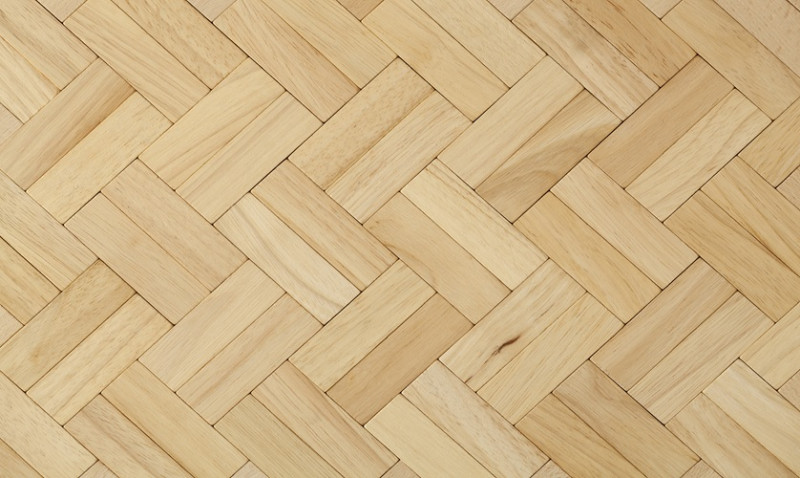
Herringbone parquet is a type of wood flooring where small rectangular planks are laid in a zigzag pattern to create a distinctive V-shaped design. The name “herringbone” comes from its resemblance to the skeleton of a herring fish. When made in oak, it combines a classic pattern with the durable and stylish characteristics of one of the most sought-after hardwoods in interior design.
Why oak? Oak is known for its toughness, resistance to wear, and beautiful grain patterns. When laid in a herringbone pattern, it becomes a statement element in any room. It complements a wide variety of interior styles—from modern minimalist schemes to traditional and rustic spaces.
Parquet blocks are smaller than traditional planks and are usually available pre-finished or unfinished. Pre-finished boards are popular for DIYers as they reduce finishing steps, while professionals or design-focused users may opt for unfinished boards to apply bespoke stains and finishes on-site.
In most cases, herringbone parquet is installed as engineered wood flooring, making it compatible with underfloor heating and reducing movement caused by seasonal changes. Solid herringbone is also available but requires more skills to install and maintain.
Tools and Materials You’ll Need
Before you get started, ensuring you have the correct tools and materials is essential. Preparing in advance will save time, reduce mistakes, and make for a smoother installation.
| Tools | Materials |
|---|---|
| Spirit level | Engineered oak herringbone parquet blocks |
| Tape measure | Flooring adhesive (PU or MS polymer-based) |
| Notched adhesive trowel | A suitable moisture barrier or primer (for concrete) |
| Floor roller or hand roller | Spacers |
| Rubber mallet | Scotia or skirting (optional finish) |
| Chalk line or laser level | Decorative edging or border (optional) |
| Fine saw or jigsaw | Cleaning wipes or cloth |
Some form of dust control and good lighting will also help immensely, particularly if you’re working in a larger area or across several days.
Step 1: Prepare the Subfloor
The first and most crucial step is preparing your subfloor. The success of a herringbone parquet installation heavily depends on a level, clean, and dry surface. Skimping on preparation can lead to uneven alignment and creaking boards down the line.
For concrete subfloors, use a moisture meter to ensure the surface reads below 75% relative humidity. Apply a DPM (damp proof membrane) or suitable primer if needed. Grinding or levelling compounds may be required if the base is uneven beyond 2-3mm over 2m.
If you have timber subfloors, check for loose boards, squeaks, or signs of rot. Secure all boards and add plywood sheets on top to provide a flat and consistent installation surface. Use appropriate screws and avoid nails that can loosen over time.
Vacuum thoroughly to remove dust and debris. If using an adhesive-only installation method, you’ll want to be sure there are no waxy or oily residues that could affect the bond.
Step 2: Find the Starting Point & Mark Layout
With herringbone especially, layout planning is essential. Unlike straight plank flooring, any skew or misalignment will be obvious and carry through the entire room. A good installation starts with an accurate central line from which the rest of the pattern will radiate.
Mark the centre of the room using chalk lines. For rooms with architectural features like fireplaces or large windows, it often makes sense to align the pattern with those elements rather than just the room shape.
Lay a 'dry run' using a few blocks, without adhesive, to see how the pattern flows. Ensure the backbone of the herringbone pattern—known as the 'spine'—is perfectly straight. You can use a batten on the floor as a guide to keep everything aligned.
If you plan to use a border, mark its dimensions now so you know when to stop the herringbone field and insert a decorative or functional edge.
Step 3: Begin Installation
Start the install at the central guideline with a pair of parquet blocks forming the initial 'V'. Apply adhesive using a notched trowel in small, manageable sections. Be careful not to spread adhesive too far ahead or it may dry before you reach it.
Press the blocks firmly into the adhesive using body weight and a rubber mallet if needed. Use spacers at the edges if an expansion gap (usually around 10-12mm) is required. This will later be covered with skirting or scotia.
Work outwards from your spine line in sets of rows, maintaining symmetry and checking alignment often. Long herringbone legs can shift, so it's wise to use set squares or straight edges to confirm the rows are true.
Stagger progress and allow previous rows to bond a little before leaning or installing heavy boards nearby. This is particularly important for smaller-format blocks that can shift if knocked.
Step 4: Trimming & Final Rows
Once you’re close to the wall or designated borders, you’ll need to trim the ends of the blocks to size. Use a fine-toothed saw or jigsaw for precision. For tighter corners or awkward shapes, a multi-tool or chisel may be useful.
It’s standard practice to install a border strip or frame the herringbone pattern with a single-plank width. This provides a neater transition and helps mask any minor inconsistencies. Lay these bordure pieces last, once the main pattern is bonded.
Allow the adhesive to fully cure (usually 12-24 hours, depending on the manufacturer’s instructions) before walking on the surface or applying finishing touches like furniture or edging.
Step 5: Finishing Touches
If you’ve used unfinished boards, now is the time to sand and apply your chosen finish. You may wish to use a clear lacquer, a tinted oil, or a hard wax oil depending on your desired sheen and colour effect.
Always test any finishing product on a small offcut or hidden area before applying across the entire floor. Application methods vary—some are brushed, others rolled or sprayed—but good ventilation and dust control are crucial during this step.
If working with pre-finished blocks, make sure all glue residue or fingerprints are carefully cleaned off with a gentle wood-safe wipe. Install your skirting, thresholds, and scotia profiles as needed.
It's common to leave furniture off the floor for at least 24-48 hours to let everything settle and cure fully. After that, your stunning herringbone oak parquet floor is ready to be enjoyed.
Maintenance Tips
To ensure your new floor lasts for decades:
- Use felt pads under furniture to avoid scratches
- Clean regularly with a soft-bristle brush or vacuum designed for hard floors
- Avoid soaking the surface with water—use a damp mop instead
- Top up finish or oil every few years, depending on wear
- Keep indoor humidity consistent (ideally between 40–60%) to minimise expansion or contraction
Conclusion
Installing a herringbone oak parquet floor is a rewarding way to elevate the elegance and value of your home. While it requires patience, planning, and a bit more precision than standard plank flooring, the result is truly spectacular.
From modern flats in London to classic cottages in the Cotswolds, herringbone parquet complements British interiors with timeless beauty and European craftsmanship. Whether you tackle it yourself or work with a tradesman, knowing the steps involved empowers you to make smart decisions and achieve a flawless result.
Thinking of upgrading your floors? Browse our curated selection of premium oak herringbone parquet and get inspired to start your next project today!
