Vinyl plank flooring has exploded in popularity across the UK—and for a good reason. It’s affordable, durable, waterproof, and looks remarkably like real hardwood. But while most people focus on main areas like living rooms and kitchens, don’t overlook the importance of installing vinyl plank flooring in smaller spaces too, such as your closets. Whether you're doing a full room renovation or just giving your wardrobe area a facelift, installing vinyl plank flooring in closets is an easy, effective upgrade. And yes—you can do it yourself!
In this post, we’ll walk you through the simple step-by-step process to install vinyl plank flooring in closets the smart and professional way, without stress or mess. Whether you're a DIY enthusiast sprucing up your first home or a tradesperson looking for a quicker workflow, these practical tips will help you boost both style and function easily.
Why Install Vinyl Plank Flooring in Closets?
Closets are often overlooked during home renovation projects, but finishing them with matching flooring is key to achieving a seamless, high-end look throughout your space. Consistent flooring can make small spaces feel more cohesive, increase resale value, and best of all—it’s easy to clean.
If your bedroom already has vinyl plank flooring, continuing it into your closet makes sense visually and practically. You’ll eliminate trip hazards caused by uneven floor heights and give your space a professional finish. Plus, vinyl plank is the ideal option for closets because it’s moisture-resistant, scratch-proof, and doesn’t require polishing.
Closets can also accumulate dust and debris faster than you think. Carpet can trap allergens and odours, but vinyl plank flooring offers an easy-to-clean, low-maintenance alternative. Simply sweep or mop, and you’re good to go!
Tools and Materials You’ll Need
Before diving into the installation, let’s make sure you’ve got all the necessary tools and materials. Preparing your workspace properly will make the job smoother and quicker.
| Tool/Material | Purpose |
|---|---|
| Luxury Vinyl Plank (LVP) Flooring | Main flooring material |
| Utility Knife | Cutting planks to size |
| Rubber Mallet | Tapping planks into place |
| Spacers | Maintain expansion gap |
| Measuring Tape | Accurate cuts and layout |
| Square or Ruler | Marking straight cuts |
| Pencil or Marker | Labelling cuts and planks |
| Underlay (if required) | Provides soundproofing and moisture barrier if not pre-attached |
Tip: Always check whether your vinyl planks come with an integrated underlay—many modern products do, which means a quicker install!
Step-by-Step Installation Guide
1. Empty the Closet and Prepare the Subfloor
Start by removing everything from the closet, including clothing, shoe racks, and any baseboard or skirting if applicable. Once cleared, inspect your subfloor. It needs to be clean, level, and dry. Use a spirit level to check for bumps or dips, and sand or fill as needed.
If you’re installing over concrete or tile, lay a moisture barrier sheet. If going over old vinyl or wood subflooring, a quick vacuum and dusting may suffice. Never install LVP over carpets or uneven surface—it can lead to gapping or lifting over time.
2. Plan Your Layout
Measure the length and width of the closet and work out how many full planks you can fit. Try to avoid thin slivers of plank at edges as they’re harder to install securely. You may need to cut the first row widthwise to ensure the last row is at least half a plank thick—this will give a more professional look.
Tip: Lay the planks so they run parallel to the longest wall or follow the orientation of the main room’s flooring if the closet connects directly. This gives flow and visual harmony.
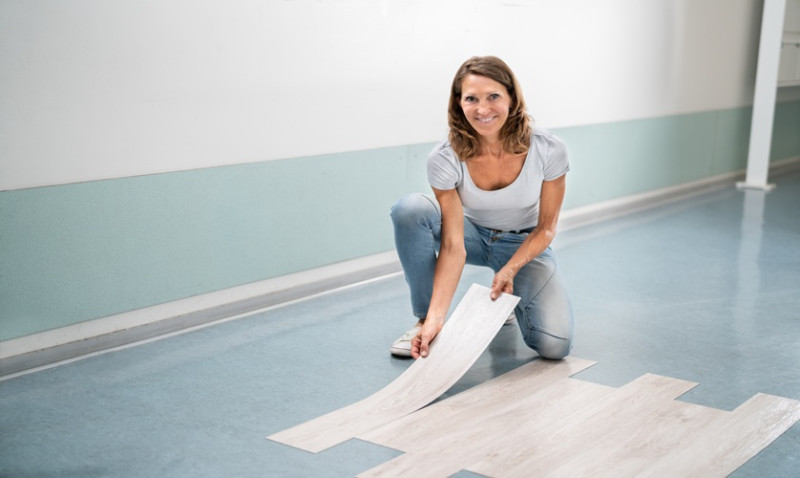
3. Cut and Fit the First Row
Take your first plank and trim it (if needed) so the cut edge is against the wall. Use spacers to maintain a recommended 5–10mm expansion gap between the wall and the flooring.
Snap the next plank into position using the tongue-and-groove system. Tap it gently into place using your rubber mallet and continue across the row. At the end of the row, measure and cut the final plank to size—always save the offcut for starting the next row, as this staggers the joints and looks more natural.
4. Continue Each Row and Make Cuts as Needed
Repeat row by row, ensuring the joints are staggered at least 15cm. When working around corners, door frames, or built-in structures, carefully measure and cut your planks to size with your utility knife. For complex cuts—or tighter closets—you may prefer a jigsaw or multitool for precision work.
If you need to go under a door jamb, undercut the trim using a handsaw or oscillating tool so planks can neatly slide underneath. This removes the need for awkward cuts and gives a clean finish.
5. Finish With Trim or Skirting
Once flooring is complete, remove spacers and reinstall any baseboard or apply new skirting to cover the expansion gaps around the perimeter. Use colour-matching caulk around corners if necessary for a seamless look. For fixed built-ins or wardrobes in the closet, apply silicone around the base to prevent dust and debris collecting under the units.
And just like that—you’ve transformed your closet into a modern, easy-clean space that matches the rest of your home!
Pro Tips for a Cleaner, Smarter Installation
- Acclimate Your Planks: Let the planks sit in the room for 24–48 hours before installation to acclimate to room temperature and humidity.
- Keep a Clear Cutting Zone: Set up a workspace nearby with your tools and cutting surface for efficient workflow.
- Buy Extra: Always purchase 10% more flooring than you need to account for offcuts or errors.
- Damp Mop Only: Once installed, clean using a damp (not wet) mop. Avoid steam or abrasive cleaners.
Final Thoughts
Installing vinyl plank flooring in a closet is a small project with huge returns. Whether you’re a first-time homeowner, a renovation-savvy DIYer, or a professional designer looking to upgrade a space, this is one of the simplest and most rewarding projects you can complete in a weekend.
With very few tools and some careful planning, you'll add instant value and polish to any closet space. Plus, with vinyl's resilience and low-maintenance appeal, it's a decision that stands strong for years to come—especially in the UK's often unpredictable climate.
Ready to get started? Turn your once-forgotten closet into a space you’ll want to keep tidy and stylish. And if you’ve already laid vinyl in your main rooms, there’s no excuse—extend that flooring into your closet the easy way!
