If you’ve ever looked at your tired, scratched hardwood floors and dreamed of restoring them to their original beauty—but baulked at the cost of hiring professionals—this guide is for you. Refinishing hardwood floors might sound like a daunting task reserved for experienced tradespeople, but with the right guidance and tools, it’s entirely possible to do it yourself. I took the plunge, learned as I went along, and ended up saving over £4,000 in the process. Here's everything you need to know to transform your floors without breaking the bank.
Why Refinish Your Hardwood Floors?
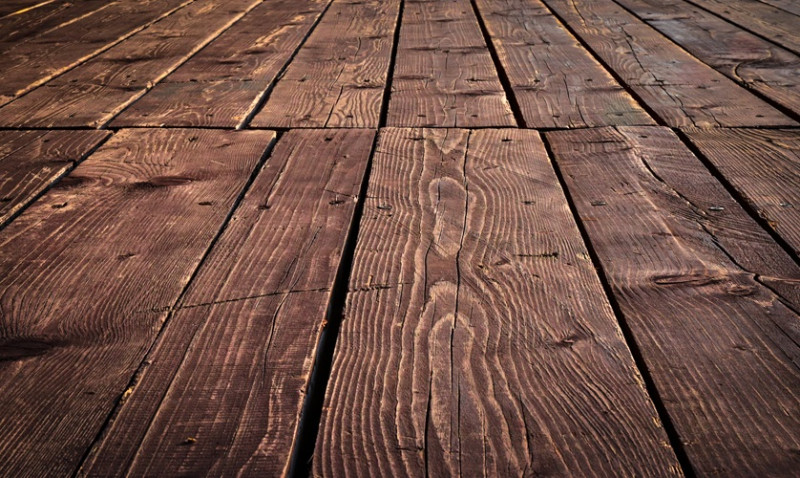
Hardwood floors are one of a home’s most attractive features, offering warmth, elegance, and long-term durability. Over time, however, they can become scratched, dull, or discoloured due to foot traffic, furniture movement, pet claws, or sun exposure. Refinishing restores the wood, removes imperfections, and gives your room a fresh new look.
Hiring professionals in the UK can easily cost between £30-£50 per square metre—meaning even a modest 30 sqm floor could set you back over £1,500. Add in fees for moving furniture, extra prep, and potential hidden costs, and you're quickly approaching a figure that might not be in your renovation budget. Doing it yourself not only saves money but also gives you greater control over the look and finish of your floor.
Whether you're a DIY enthusiast, a young professional sprucing up your first home, or even an interior designer looking to learn the process, this guide breaks down the essential steps.
What You'll Need: Tools and Materials Checklist
Before you get started, make sure you’ve gathered all the necessary tools and materials. It’s worth investing in quality tools or hiring them from your local tool centre. Many can be rented inexpensively by the day or weekend.
| Tool/Material | Purpose |
|---|---|
| Drum or orbital floor sander | Removes top layers of the floor finish |
| Edge sander | Reaches corners and edges the main sander can't |
| Sanding discs/pads (various grits) | Start with coarse grit for removal, then finer for smooth finish |
| Wood filler (optional) | Fills cracks or gouges in floorboards |
| Vacuum and tack cloths | Removes dust between sanding stages |
| Stain (optional) | Colours the wood, giving it a personalised finish |
| Floor finish (polyurethane, oil, or wax) | Protects the wood and gives it a glossy, satin, or matte sheen |
| Brushes/rollers or application pads | Applies the finish evenly |
| Dust mask and ear protection | Essential protection during sanding |
These items are widely available in most UK hardware stores like B&Q, Wickes, and Toolstation, or you can hire sanders from companies like HSS Hire or Brandon Hire Station.
Step 1: Prepare Your Room
First, clear the room of all furniture, rugs, and decorations. Remove baseboards if you wish to sand all the way to the edges, although this is optional. Clean the floor thoroughly and inspect for protruding nails—a hammer and nail punch can be used to countersink them to avoid damaging your sander.
Cover any vents, doorways, or nearby furniture with dust sheets or plastic to protect them from sawdust. Make sure there’s good ventilation; opening windows and using fans can help circulate air and reduce fumes later when applying finishes.
Taking the time to prepare your space properly saves headaches later and helps you achieve a more professional finish.
Step 2: Sand the Floor
Start with coarse-grit sandpaper (36-grit) to remove the old finish and level the surface. Move slowly with the sander in the direction of the wood grain and overlap each pass to avoid uneven sanding. Once you've sanded the entire area, repeat the process with a medium-grit (60 or 80) and finally with fine-grit (100-120) for a smooth base.
Use the edge sander for corners and edges, and hand-sand any spots missed. Be meticulous—any unsanded finish left behind may prevent stains or topcoats from adhering properly.
Between each phase, vacuum the floor and wipe it with a tack cloth to minimise dust.
Step 3: Apply Stain (Optional)
If you want a specific colour tone for your floors—richer oak, darker walnut, or stylish greys—you’ll need to apply a stain. Test your stain on an inconspicuous area or a spare board to ensure you like the result. Apply with a clean cloth, working in manageable sections and wiping away the excess promptly to avoid blotchiness.
Allow the stain to dry thoroughly according to manufacturer instructions, usually 6–24 hours depending on the product and weather conditions.
While staining is optional, it’s a great way to customise your floors to suit your interior aesthetic.
Step 4: Finish and Protect
Once the stain is dry (or if you're skipping staining), apply your protective finish. In the UK, water-based polyurethane is popular due to its low odour, quick drying time, and clear colour. Oil-based finishes offer a deeper glow but take longer to cure and have stronger fumes.
Use a foam roller or applicator pad to apply the finish in smooth, even strokes with the grain. Allow the coat to dry fully before lightly sanding with fine sandpaper, cleaning the surface, and applying the next coat.
Apply 2–3 coats for best durability, and leave the floor to cure per the manufacturer's guidelines before moving furniture back in—this could be 72 hours or longer for oil-based finishes.
Common Mistakes to Avoid
- Skipping grits when sanding: Moving from a coarse directly to a fine grit can leave scratches behind.
- Over-sanding: Especially with old floors, this can reduce the thickness of the boards too much.
- Not cleaning thoroughly between steps: Dust can settle into the finish and ruin the final look.
- Applying finishes too thickly: This can cause bubbling or sticky patches.
- Rushing the process: Drying and curing times are essential for long-lasting results.
My Cost Breakdown (and How I Saved £4,000+)
Here's a quick breakdown of what I spent refinishing approximately 40 sqm of oak floor:
| Item | Cost |
|---|---|
| Drum & edge sander hire (2 days) | £110 |
| Sandpaper discs | £40 |
| Stain (optional) | £30 |
| Finishing product (water-based polyurethane) | £60 |
| Misc (masks, pads, cloths, tape, filler) | £50 |
| Total | £290 |
Local quotes I received from professional floor refinishers ranged between £1,500 and £5,000 depending on finish and complexity. By taking on the challenge myself, I saved a minimum of £1,200 and potentially over £4,000.
Final Thoughts and Tips
Refinishing your hardwood floors doesn’t have to be a high-cost, professional-only project. With a bit of elbow grease and patience, even beginners can achieve stunning, durable results at a fraction of the cost. Not only did I get floors that look beautiful and feel like new, but I also developed skills I now use in other DIY projects around the home.
The key is preparation, understanding the process, and not rushing. Take your time, have the right tools ready, and trust yourself—many homeowners across the UK are doing this, so you can too.
If you're still unsure, start small—perhaps a single room or hallway—and build your confidence. Before long, you might be the go-to expert in your circle, and you’ll definitely have floors worth showing off.
Have questions or want to share your own experience? Leave a comment or connect with us—especially if you've tried this in your UK flat, Victorian terrace, or countryside cottage. We love seeing your before and afters!
